JW’s Bias Blanket (Free & Easy Knit Blanket Pattern)
If you’re looking for a cozy and easy knit blanket pattern, good news, you’ve come to the right place! Made on the bias using simple stitches with easy increases and decreases, this chunky knit blanket will become your new go-to for baby shower gifting. Simple garter stitch stripes adorn a smooth stockinette stitch background creating an effortlessly textured end result.
As always, the free pattern will remain here on the blog forever. Click here if you’d like an ad-free and easy to read PDF. (Scroll to the bottom of this post for your FREE PDF download for a limited time!)
Inspiration
The inspiration for this design came from the stitch pattern in the classic Grandma’s Favorite Dishcloth pattern. Although no one knows where this pattern originated, it’s a traditional dishcloth pattern that’s very popular in the knitting community.
I’ve created a few other designs inspired by the Grandma’s Favorite Dishcloth pattern and here I’ve got another fresh and modern spin on it. Click/tap the links below to check out my other Grandma’s Favorite Dishcloth inspired designs.
About the Yarn
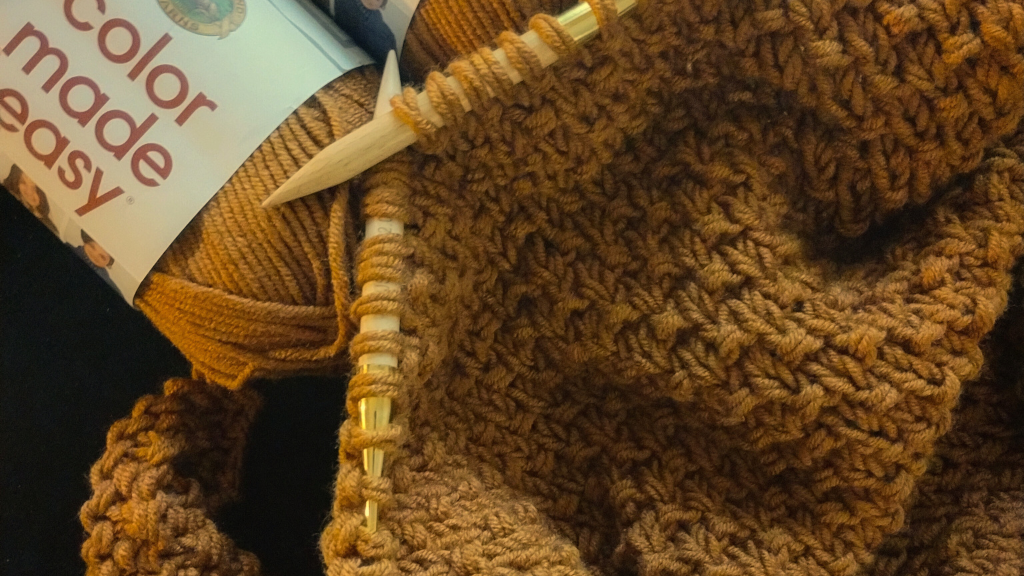
The yarn used in the sample photos is Lion Brand Yarn Hue + Me, a #5 bulky yarn. This is my first time using this yarn and I absolutely loved working with it.
This easy knit blanket pattern is designed to be worked with any weight and type of yarn. Because it starts at the smallest point and is worked to the desired size, then decreased to create a square blanket, any yarn can be used. For this reason, gauge is also not important for this project.
Techniques Used
I told you where the inspiration came from, now let’s talk about techniques. This easy knit blanket design uses basic stitches plus a few more techniques than my other Grandma’s Favorite Dishcloth inspired designs but is still considered easy skill level and a good project for adventurous beginner knitters.
The majority of the baby blanket knitting pattern is made using knit stitches and purl stitches. The increases are made using simple yarn overs and k1fb (see Stitch Index below). There are a few more decreases used, but none are complicated. Decreases used in this knitted blanket include k2tog, ssk, p2tog, and p3tog (see Stitch Index below).
Another technique I used is slip stitches at the beginning of each row. This is one of those basic techniques that really elevates the overall look of your finished knit. It creates a very clean looking edge that I absolutely love.
I made mine baby blanket size but this pattern is easily customizable to different sizes as well. Simply increase until you reach your desired size, then start your decreases.
If you’re newer to knitting, this is a great design to practice those increase and decrease skills with a mostly mindless knitting project. Look for a video tutorial coming soon!
Looking for more blanket patterns? Click here to see my other patterns for knitting blankets!
Skill Level
Easy
Gauge
12 sts and 18 rows of stockinette stitch is 4″ x 4″ (10x10cm), after blocking
Finished Measurements
40” x 40” (400x400cm), after blocking
Materials
6 balls Lion Brand Yarn Hue + Me (#5 Bulky Weight Yarn)
OR
A sufficient amount of yarn of your choice.
US Size 10.5/UK Size 3/6.5mm 40” circular needles (or recommended needle size for the yarn you’re using)
Tapestry needle or yarn needle for weaving in ends
Scissors
Measuring tape or gauge swatch measuring device (optional but not required)
Blocking mats and pins (optional but recommended for this project)
Notes
– The pattern is worked flat, not in the round. Circular knitting needles with a long cord are needed to hold the large number of stitches.
– The pattern is designed to be worked with any weight and type of yarn and to any desired size.
– The gauge provided is for the sample in the photos but is not important for this project.
– (xx) at the end of a row/round indicates how many total stitches for that row/round
Stitch Index
CO – cast on
R – row/round
BO – bind off
yo – yarn over
k – knit
k1fb – knit 1 front and back (knit 1 through the front leg of the stitch, do not remove stitch from left needle, knit 1 through the back leg of the stitch, remove stitch from left needle [increase by 1 st])
k2tog – knit 2 stitches together as one [decrease by 1 st, right leaning]
ssk – slip 1 st knitwise, slip 1 st knitwise, pass 2 sts from the right needle to the left needle one at a time, insert right needle into the back of both slipped sts on the left needle, knit [decrease by 1 st, left leaning]
p – purl
p2tog – purl 2 stitches together as one [decrease by 1 st]
p3tog – purl 3 stitches together as one [decrease by 2 sts]
Now let’s get started on this easy blanket!
Pattern
Foundation CO 5 using your preferred method
R1 sl1p, k to end (5)
R2 sl1p, kfb, k1, kfb, k1 (7)
R3 sl1p, k to end (7)
R4 sl1p, k1, yo, k3, yo, k2 (9)
R5 sl1p, k1, p5, k2 (9)
R6 sl1p, k1, yo, k until 2 sts remain, yo, k2 (11)
R7 sl1p, k1, p until 2 sts remain, k2 (11)
R8-15 repeat R6-7
R16 sl1p, k1, yo, k until 2 sts remain, yo, k2 (21)
R17 sl1p, k to end (21)
R18-21 repeat R16-17
R22 sl1p, k1, yo, k until 2 sts remain, yo, k2 (27)
R23 sl1p, k1, p until 2 sts remain, k2 (27)
R24-33 repeat R22-23 (37)
Repeat R16-33 until you have 137 sts or until your desired size, ending after 4 rows of a 12 row st st repeat. Once you reach the widest point, you will keep the same number of sts for 4 rows, then start the decrease section. Row count will start back at 1.
R1 sl1p, k to end (137)
R2 sl1p, k1, p until 2 sts remain, k2 (137)
R3-4 repeat R1-2 (137)
R5 sl1p, p2tog, yo, ssk, k until 5 sts remain, k2tog, yo, k2tog, k1 (135)
R6 sl1p, k1, p until 2 sts remain, k2 (135)
R7-8 repeat R5-6 (133)
R9 sl1p, p2tog, yo, ssk, k until 5 sts remain, k2tog, yo, k2tog, k1 (131)
R10 sl1p, k to end (131)
R11-14 repeat R9-10 (127)
R15 sl1p, p2tog, yo, ssk, k until 5 sts remain, k2tog, yo, k2tog, k1 (125)
R16 sl1p, k1, p until 2 sts remain, k2 (125)
R17-26 repeat R15-16
Repeat R9-26 until 9 sts remain, ending after R10 of the last 12 row st st repeat.
sl1p, p2tog, p3tog, p2tog, k1 (5)
sl1p, k to end (5)
BO in pattern
Finish off and weave in ends. I recommend blocking this blanket to help with the curling from the stockinette stitch on the beginning and ending corners.
For a limited time, click here to download your FREE PDF pattern! Don’t forget to sign up for my newsletter so you never miss new blog content!
Final Thoughts on This Easy Knit Blanket Pattern
I would love to see you all get creative with what yarn weight you use and even with different color sections. I hope you enjoyed this free knit blanket pattern! If this is your first knitting pattern, let me know in the comments how it went!
Sharing is caring and a great way to support small businesses like mine at no additional cost! Bookmark this blog post or pin it to your favorite Pinterest board for later and to share with your friends.
Happy knitting!
PLEASE READ: THIS PATTERN AND ITS CONTENTS ARE THE SOLE PROPERTY OF YARNIQUE (CHANTAL CAMPSEY) AND MAY NOT BE ALTERED, SOLD, OR REDISTRIBUTED IN ANY WAY WITHOUT PERMISSION FROM ITS AUTHOR. YOU MAY, HOWEVER, SELL AS MANY FINISHED PROJECTS AS YOU DESIRE, I JUST ASK THAT YOU REFERENCE MY BLOG AND/OR SHOPS FOR CREDIT FOR THE PATTERN.

9 Comments
ELEANOR HIRTLE
Thanks for the simple but great pattern
Chantal Campsey
Thank you and you’re welcome!
Modesta Witting
Great insights! Thanks for sharing.
Chantal Campsey
Thank you!
Reuben McDonald
I am excited to knit this beautiful blanket
Chantal Campsey
Thank you! I would love for you to share your finished blanket with me on social!
Dana
If one wanted a ridge to be a different color when in the pattern would this happen?
Thanks
Chantal Campsey
Thanks for your comment, Dana. To create colored ridges, your first color change would be at the end of row 15, before you start row 16. Your ridges are 6 row repeats and your stockinette stitch stripes are 12 row repeats. Hope this helps!
Pingback: