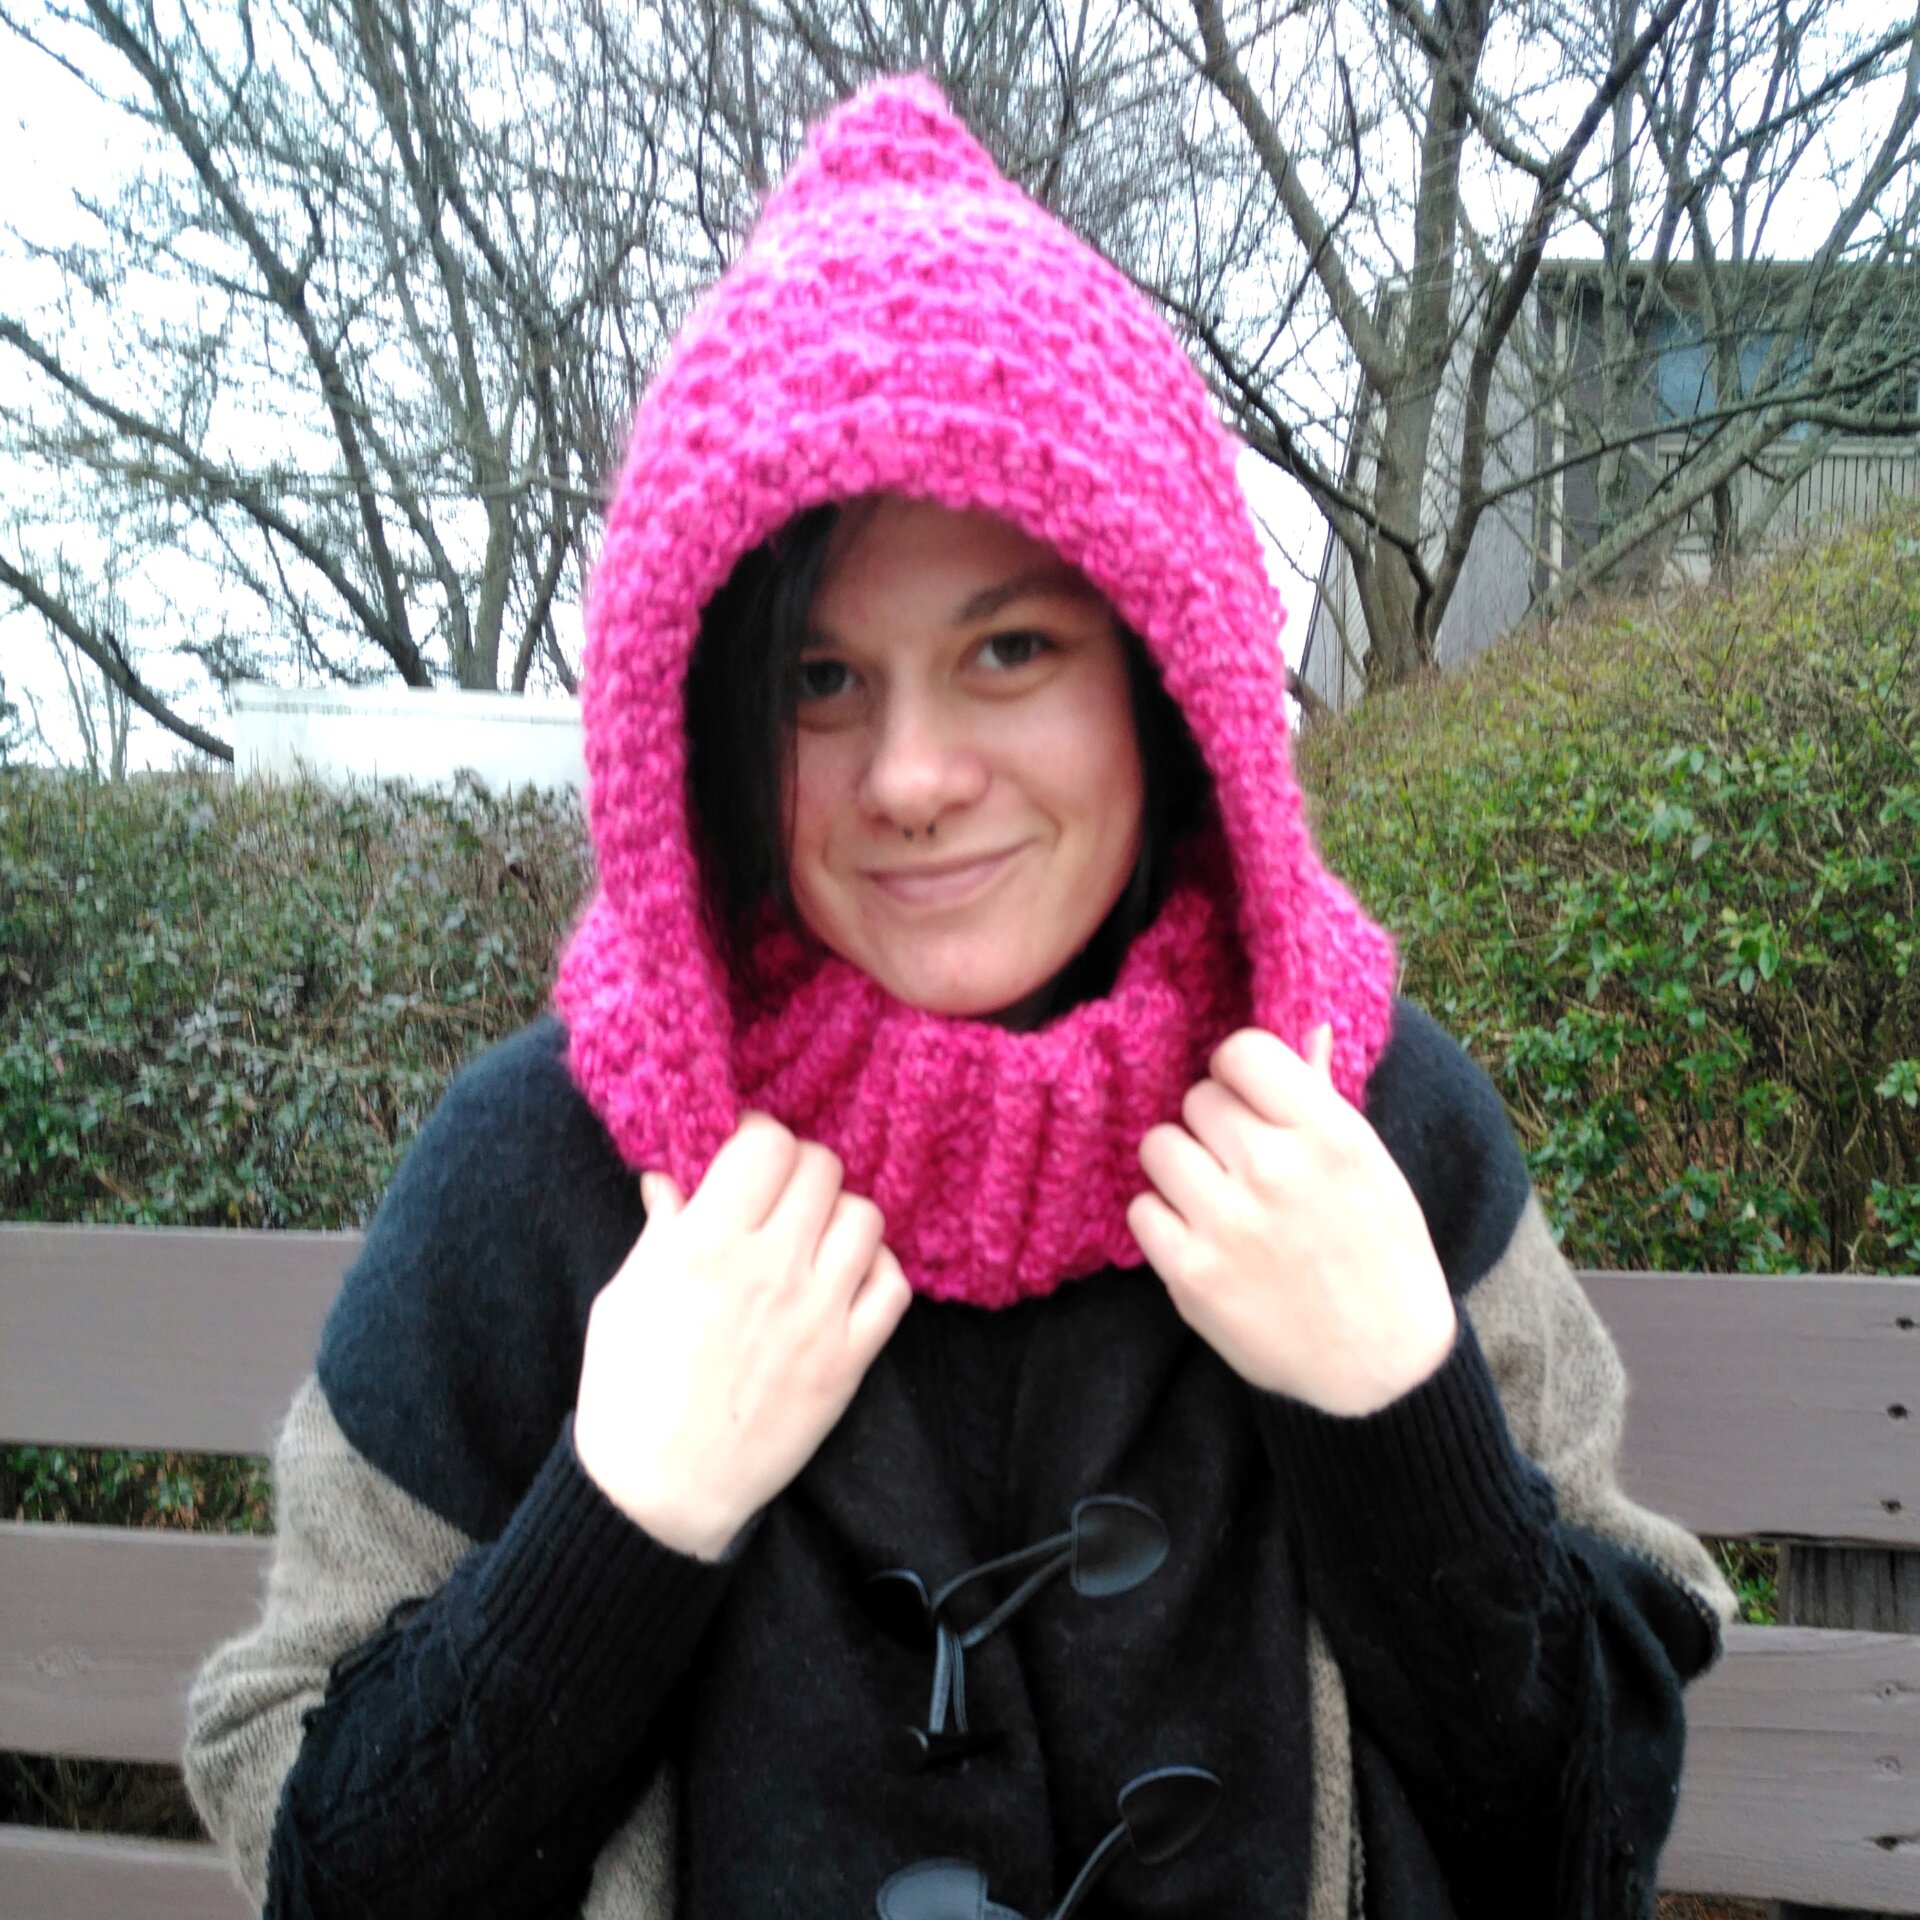
Sweet N Sour Beanie (Free Crochet Pattern)

The Sweet N Sour Beanie is part of the E’Claire Makery Fall Fashion blog hop! Make sure you go check out all the other awesome designs that were included!
Introduction
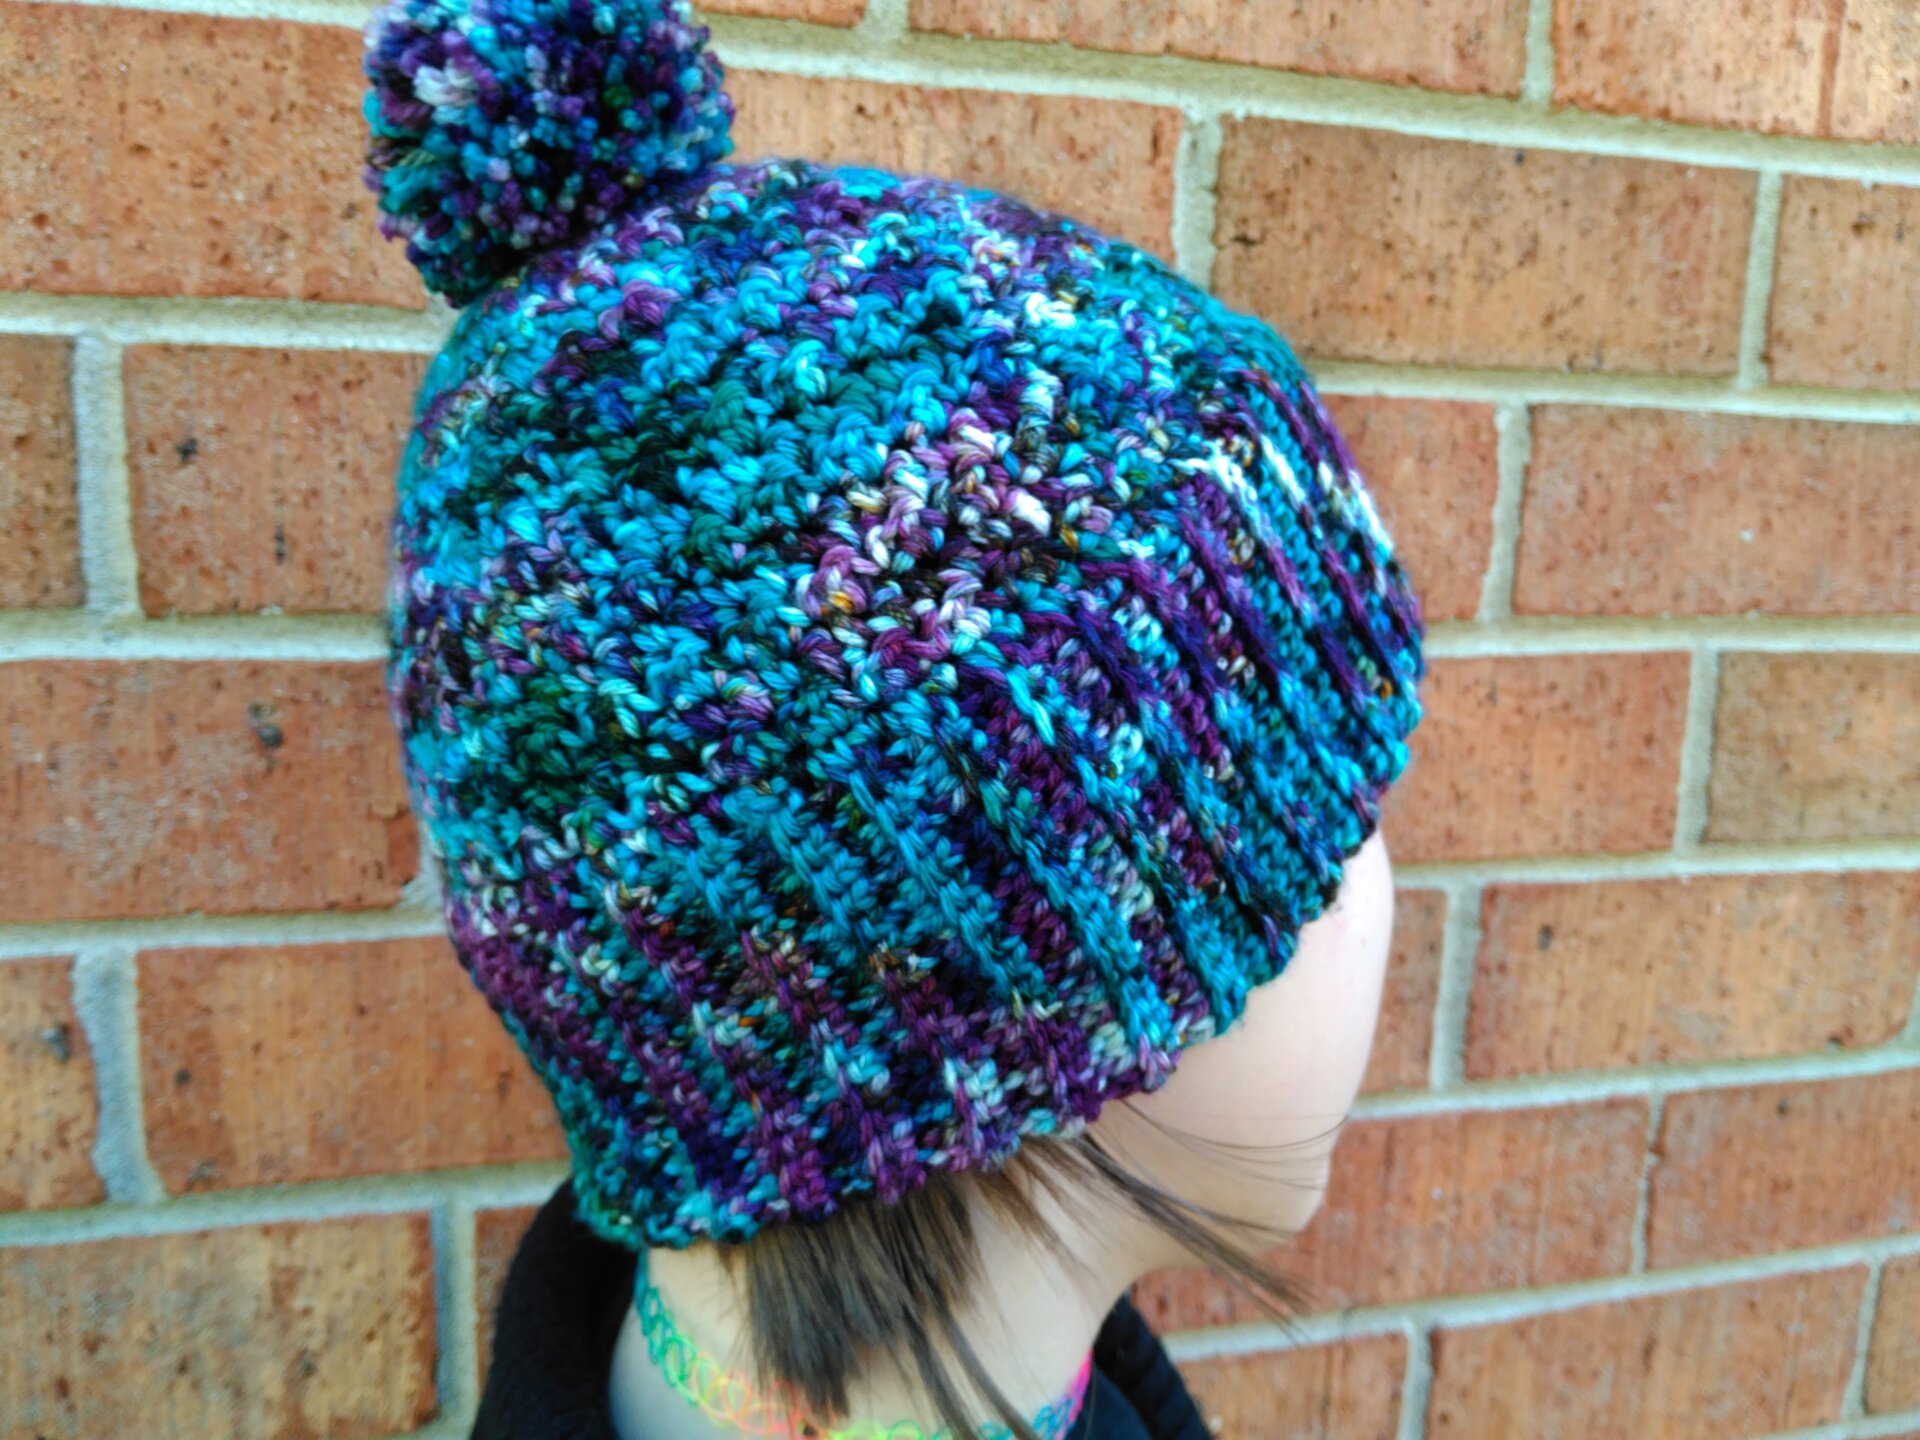
This beanie got its name from the stitch used and how it’s so warm and cozy. The ‘Sweet’ is the warm and cozy part and the ‘Sour’ is the Lemon Peel Stitch! The beanie is super cute with the texture but still super cozy with the double brim. I also love that it’s a completely unisex design!
Skill Level
Intermediate
Gauge
16 sts and 14 rows of Lemon Peel Stitch (see Stitch Index) with a 4.5mm hook is 4” (10cm)
Finished Measurements
(to fit head circumference and actual finished measurements (laid flat) in parentheses)
Baby (6-12 months) 17-18” (6.5” wide and 6.25” tall)
Toddler (1-3 years) 18-19” (7” wide and 6.5” tall)
Child (4-10 years) 19-20” (7.5” wide and 6.75” tall)
Teen/Small Adult 20-21” (8” wide and 7.25” tall)
Adult Medium/Large 21-23” (8.5” wide and 7.5” tall)
Materials
150-250 yards of any worsted weight yarn you can meet gauge with (The red version photoed is Lion Brand Pound of Love and the multi-colored version photoed is hand-dyed yarn from KT And The Squid)
US Size G/6/4mm crochet hook (I use these!)
US Size 7/4.5mm crochet hook (I use these!)
Stitch marker (optional)
Tapestry needle for weaving in ends
Scissors
Notes
-Use invisible decreases throughout the pattern (yo, insert hook into the FLO (or BLO) of the first stitch to decrease, insert hook into the FLO (or BLO) of the second stitch to decrease, yo and pull through 2 loops, finish stitch as usual)
-Pattern is written as follows: Baby (Toddler, Child, Teen/Small Adult, Adult Medium/Large).
-* * indicates a repeat
-(xx) at the end of a row/round indicates how many total stitches for that row/round
Stitch Index
R-row/round
RS-right side
WS-wrong side
dec-decrease
BLO-crochet in the back loop only of the indicated stitch(es)
ch-chain
st(s)-stitch(es)
sl st-slip stitch
sc-single crochet
dc-double crochet
Special Stitches
Lemon Peel Stitch-alternating sc’s and dc’s in the same row and placing dc’s in sc’s and sc’s in dc’s in subsequent rows
Click HERE for my blog post all about the Lemon Peel Stitch with written instructions and video tutorial!

Pattern
Brim (all sizes)
Foundation ch 27 (28, 29, 30, 31)
R1 (working in the back bumps) sc in the 2nd ch from your hook and each ch across, ch 1, turn (26, 27, 28, 29)
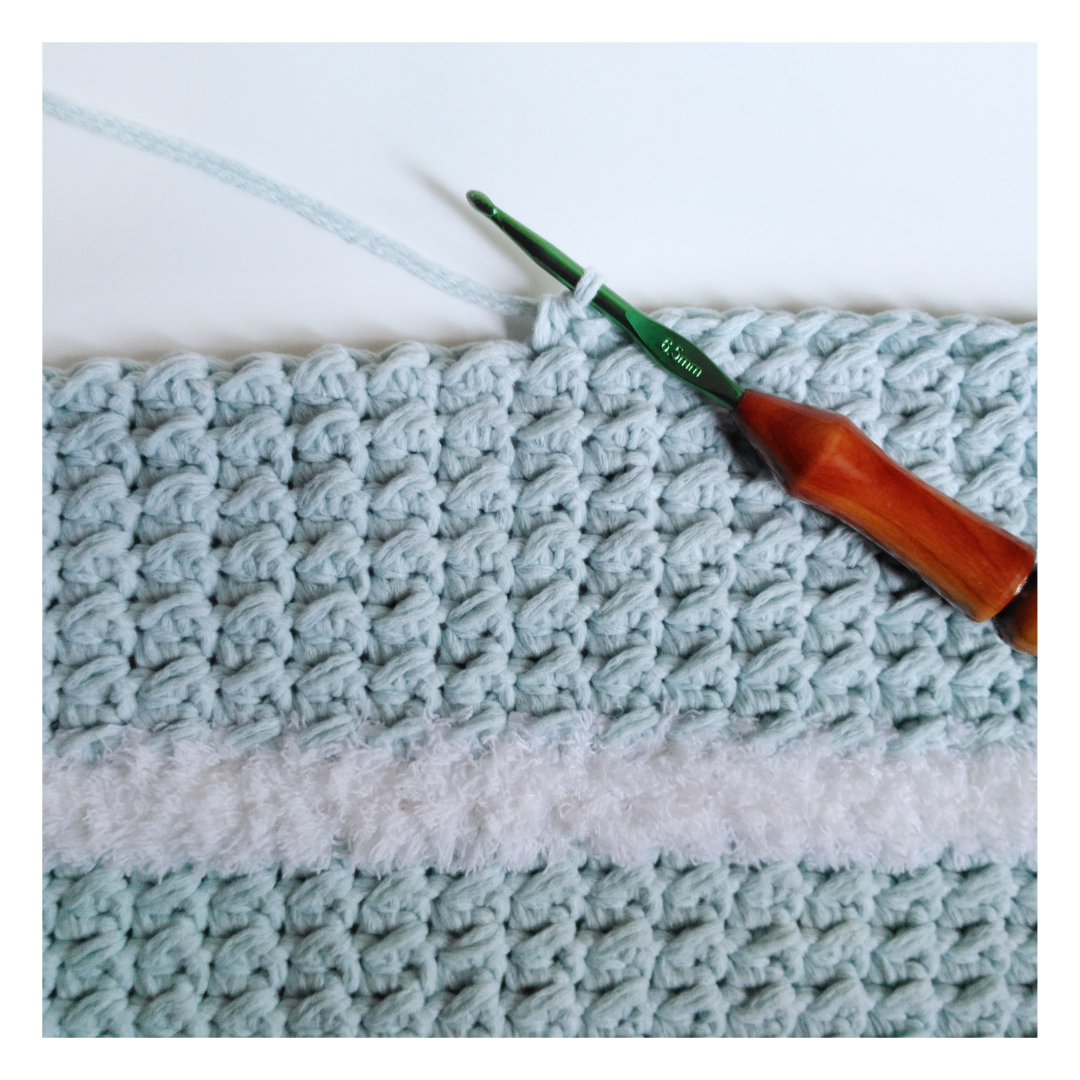
R2-59 (63, 67, 71, 75) scBLO in each st across, ch 1, turn (26, 27, 28, 29, 30) (See Figure 1 below)
R60 (64, 68, 72, 76) fold your brim to work into the first and last rows worked to join it into a continuous circle, sl st the two ends together (you should have as many sl sts as you do sts), switch to 4.5mm hook before you ch 1 after the last sl st (26, 27, 28, 29, 30) (See Figures 2-3 below)
(RS) Fold your brim in half inwards with the seam on the inside to create the double brim (See Figures 3-4 below), sc as many sts around the brim as you have rows +1 for the joining row, working through both layers to join the brim ends together (See Figures 5-8 below) ch 1, continue to the instructions for the size you’re working, you may or may not need to turn here (60, 64, 68, 72, 76)


Each size is written separately from here.

Baby (6-12 months)
Note: Row count will now start back at 1. Odd-numbered rows are WS rows and even-numbered rows are RS rows. Turn your work to start R1 on the WS. If desired, place a stitch marker in the first st of each round as it can be easy to pass it up and/or join into the wrong stitch with this textured stitch.
R1-4 *sc, dc* around, join with a sl st, ch 1, turn (60)
Note: All decreases should be made on WS rows and invisibly (through the BLO of both sts to be decreased).
R5 **sc2tog, dc2tog, *sc, dc* for 11 sts, dc2tog, sc2tog, *dc, sc* for 11 sts** repeat from ** to ** once, join with a sl st, ch 1, turn (52)
R6 *sc, dc* around, join with a sl st, ch 1, turn (52)
R7 **sc2tog, dc2tog, *sc, dc* for 9 sts, dc2tog, sc2tog, *dc, sc* for 9 sts** repeat from ** to ** once, join with a sl st, ch 1, turn
R8 *sc, dc* around, join with a sl st, ch 1, turn (44)
R9 **sc2tog, dc2tog, *sc, dc* for 7 sts, dc2tog, sc2tog, *dc, sc* for 7 sts** repeat from ** to ** once, join with a sl st, ch 1, turn
R10 *sc, dc* around, join with a sl st, ch 1, turn (36)
R11 **sc2tog, dc2tog, *sc, dc* for 5 sts, dc2tog, sc2tog, *dc, sc* for 5 sts** repeat from ** to ** once, join with a sl st, ch 1, turn
R12 *sc, dc* around, join with a sl st, ch 1, turn (28)
R13 *sc2tog, dc2tog* around, join with a sl st, ch 1 (14)
Break yarn leaving a long tail for cinching and weaving. Thread your yarn and weave through every other stitch of the last row worked. Pull tight to cinch. Pass yarn to inside and weave in. Add a pom (or two), if desired.
Weave in all ends and you’re finished!
Toddler (1-3 years)
Note: Row count will now start back at 1. Odd-numbered rows are WS rows and even-numbered rows are RS rows. Turn your work to start R1 on the WS. If desired, place a stitch marker in the first st of each round as it can be easy to pass it up and/or join into the wrong stitch with this textured stitch.
R1-4 *sc, dc* around, join with a sl st, ch 1, turn (64)
Note: All decreases should be made on WS rows and invisibly (through the BLO of both sts to be decreased).
R5 **sc2tog, dc2tog, *sc, dc* for 27 sts** repeat from ** to ** once, join with a sl st, ch 1, turn (60)
R6 *sc, dc* around, join with a sl st, ch 1, turn (60)
R7 **sc2tog, dc2tog, *sc, dc* for 11 sts, dc2tog, sc2tog, *dc, sc* for 11 sts** repeat from ** to ** once, join with a sl st, ch 1, turn (52)
R8 *sc, dc* around, join with a sl st, ch 1, turn (52)
R9 **sc2tog, dc2tog, *sc, dc* for 9 sts, dc2tog, sc2tog, *dc, sc* for 9 sts** repeat from ** to ** once, join with a sl st, ch 1, turn
R10 *sc, dc* around, join with a sl st, ch 1, turn (44)
R11 **sc2tog, dc2tog, *sc, dc* for 7 sts, dc2tog, sc2tog, *dc, sc* for 7 sts** repeat from ** to ** once, join with a sl st, ch 1, turn
R12 *sc, dc* around, join with a sl st, ch 1, turn (36)
R13 **sc2tog, dc2tog, *sc, dc* for 5 sts, dc2tog, sc2tog, *dc, sc* for 5 sts** repeat from ** to ** once, join with a sl st, ch 1, turn
R14 *sc, dc* around, join with a sl st, ch 1, turn (28)
R15 *sc2tog, dc2tog* around, join with a sl st, ch 1 (14)
Break yarn leaving a long tail for cinching and weaving. Thread your yarn and weave through every other stitch of the last row worked. Pull tight to cinch. Pass yarn to inside and weave in. Add a pom (or two), if desired.
Weave in all ends and you’re finished!
Child (4-10 years)
Note: Row count will now start back at 1. Odd-numbered rows are WS rows and even-numbered rows are RS rows. Do not turn your work. Start R1 on the RS of your work. If desired, place a stitch marker in the first st of each round as it can be easy to pass it up and/or join into the wrong stitch with this textured stitch.
R1-6 *sc, dc* around, join with a sl st, ch 1, turn (68)
Note: All decreases should be made on WS rows and invisibly (through the BLO of both sts to be decreased).
R7 **sc2tog, dc2tog, *sc, dc* for 13 sts, dc2tog, sc2tog, *dc, sc* for 13 sts** repeat from ** to ** once, join with a sl st, ch 1, turn (60)
R8 *sc, dc* around, join with a sl st, ch 1, turn (60)
R9 **sc2tog, dc2tog, *sc, dc* for 11 sts, dc2tog, sc2tog, *dc, sc* for 11 sts** repeat from ** to ** once, join with a sl st, ch 1, turn (52)
R10 *sc, dc* around, join with a sl st, ch 1, turn (52)
R11 **sc2tog, dc2tog, *sc, dc* for 9 sts, dc2tog, sc2tog, *dc, sc* for 9 sts** repeat from ** to ** once, join with a sl st, ch 1, turn (44)
R12 *sc, dc* around, join with a sl st, ch 1, turn (44)
R13 **sc2tog, dc2tog, *sc, dc* for 7 sts, dc2tog, sc2tog, *dc, sc* for 7 sts** repeat from ** to ** once, join with a sl st, ch 1, turn (36)
R14 *sc, dc* around, join with a sl st, ch 1, turn (36)
R15 **sc2tog, dc2tog, *sc, dc* for 5 sts, dc2tog, sc2tog, *dc, sc* for 5 sts** repeat from ** to ** once, join with a sl st, ch 1, turn (28)
R16 *sc, dc* around, join with a sl st, ch 1, turn (28)
R17 *sc2tog, dc2tog* around, join with a sl st, ch 1 (14)
Break yarn leaving a long tail for cinching and weaving. Thread your yarn and weave through every other stitch of the last row worked. Pull tight to cinch. Pass yarn to inside and weave in. Add a pom (or two), if desired.
Weave in all ends and you’re finished!
Teen/Small Adult (20-21”)
Note: Row count will now start back at 1. Odd-numbered rows are RS rows and even-numbered rows are WS rows. Do not turn your work. Start R1 on the RS of your work. If desired, place a stitch marker in the first st of each round as it can be easy to pass it up and/or join into the wrong stitch with this textured stitch.
R1-7 *sc, dc* around, join with a sl st, ch 1, turn (72)
Note: All decreases should be made on WS rows and invisibly (through the BLO of both sts to be decreased).
R8 **sc2tog, dc2tog, *sc, dc* for 30 sts** repeat from ** to ** once, join with a sl st, ch 1, turn (68)
R9 *sc, dc* around, join with a sl st, ch 1, turn (68)
R10 **sc2tog, dc2tog, *sc, dc* for 13 sts, dc2tog, sc2tog, *dc, sc* for 13 sts** repeat from ** to ** once, join with a sl st, ch 1, turn (60)
R11 *sc, dc* around, join with a sl st, ch 1, turn (60)
R12 **sc2tog, dc2tog, *sc, dc* for 11 sts, dc2tog, sc2tog, *dc, sc* for 11 sts** repeat from ** to ** once, join with a sl st, ch 1, turn (52)
R13 *sc, dc* around, join with a sl st, ch 1, turn (52)
R14 **sc2tog, dc2tog, *sc, dc* for 9 sts, dc2tog, sc2tog, *dc, sc* for 9 sts** repeat from ** to ** once, join with a sl st, ch 1, turn
R15 *sc, dc* around, join with a sl st, ch 1, turn
R16 **sc2tog, dc2tog, *sc, dc* for 7 sts, dc2tog, sc2tog, *dc, sc* for 7 sts** repeat from ** to ** once, join with a sl st, ch 1, turn
R17 *sc, dc* around, join with a sl st, ch 1, turn
R18 **sc2tog, dc2tog, *sc, dc* for 5 sts, dc2tog, sc2tog, *dc, sc* for 5 sts** repeat from ** to ** once, join with a sl st, ch 1, turn
R19 *sc, dc* around, join with a sl st, ch 1, turn
R20 *sc2tog, dc2tog* around, join with a sl st, ch 1
Break yarn leaving a long tail for cinching and weaving. Thread your yarn and weave through every other stitch of the last row worked. Pull tight to cinch. Pass yarn to inside and weave in. Add a pom (or two), if desired.
Weave in all ends and you’re finished!
Adult Medium/Large (21-23”)
Note: Row count will now start back at 1. Odd-numbered rows are RS rows and even-numbered rows are WS rows. Do not turn your work. Start R1 on the RS of your work. If desired, place a stitch marker in the first st of each round as it can be easy to pass it up and/or join into the wrong stitch with this textured stitch.
R1-9 *sc, dc* around, join with a sl st, ch 1, turn (76)
Note: All decreases should be made on WS rows and invisibly (through the BLO of both sts to be decreased).
R10 **sc2tog, dc2tog, *sc, dc* for 15 sts, dc2tog, sc2tog, *dc, sc* for 15 sts** repeat from ** to ** once, join with a sl st, ch 1, turn (68)
R11 *sc, dc* around, join with a sl st, ch 1, turn (68)
R12 **sc2tog, dc2tog, *sc, dc* for 13 sts, dc2tog, sc2tog, *dc, sc* for 13 sts** repeat from ** to ** once, join with a sl st, ch 1, turn (60)
R13 *sc, dc* around, join with a sl st, ch 1, turn (60)
R14 **sc2tog, dc2tog, *sc, dc* for 11 sts, dc2tog, sc2tog, *dc, sc* for 11 sts** repeat from ** to ** once, join with a sl st, ch 1, turn (52)
R15 *sc, dc* around, join with a sl st, ch 1, turn (52)
R16 **sc2tog, dc2tog, *sc, dc* for 9 sts, dc2tog, sc2tog, *dc, sc* for 9 sts** repeat from ** to ** once, join with a sl st, ch 1, turn
R17 *sc, dc* around, join with a sl st, ch 1, turn
R18 **sc2tog, dc2tog, *sc, dc* for 7 sts, dc2tog, sc2tog, *dc, sc* for 7 sts** repeat from ** to ** once, join with a sl st, ch 1, turn
R19 *sc, dc* around, join with a sl st, ch 1, turn
R20 **sc2tog, dc2tog, *sc, dc* for 5 sts, dc2tog, sc2tog, *dc, sc* for 5 sts** repeat from ** to ** once, join with a sl st, ch 1, turn
R21 *sc, dc* around, join with a sl st, ch 1, turn
R22 *sc2tog, dc2tog* around, join with a sl st, ch 1
Break yarn leaving a long tail for cinching and weaving. Thread your yarn and weave through every other stitch of the last row worked. Pull tight to cinch. Pass yarn to inside and weave in. Add a pom (or two), if desired.
Weave in all ends and you’re finished!
I hope you enjoy this fun textured beanie! Don’t forget to check out the rest of the designs featured in the E’Claire Makery blog hop!

Happy making friend!