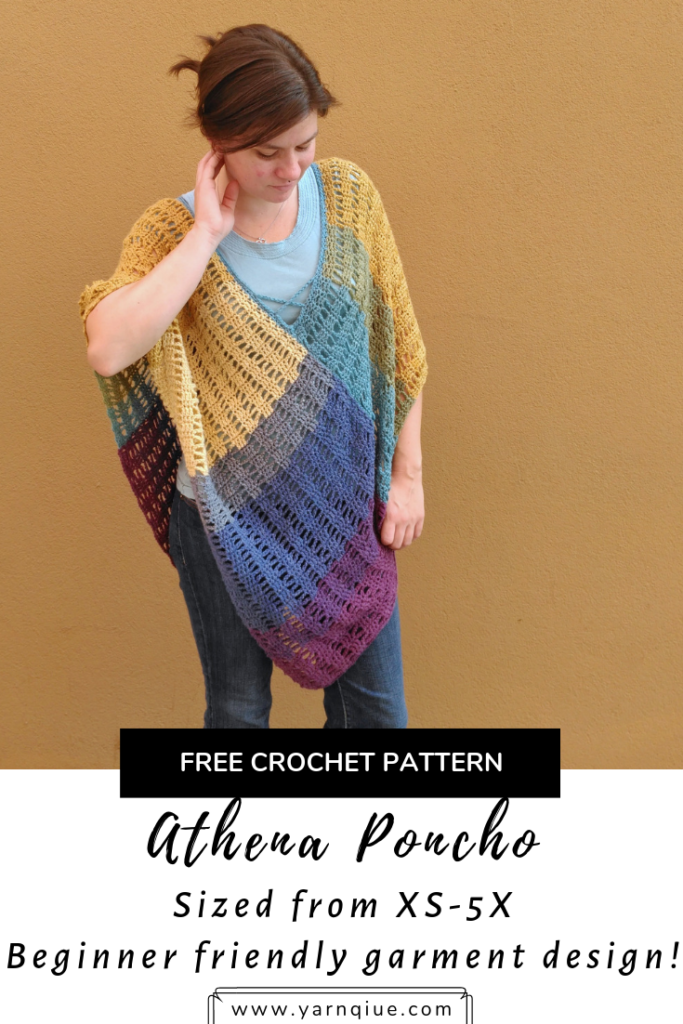
Athena Poncho (Free Crochet Poncho Pattern)
As always, this crochet poncho pattern will remain free on the blog forever, with ads. Click here if you’d like to purchase a color coded, ad-free, and easy to read PDF.
Introduction
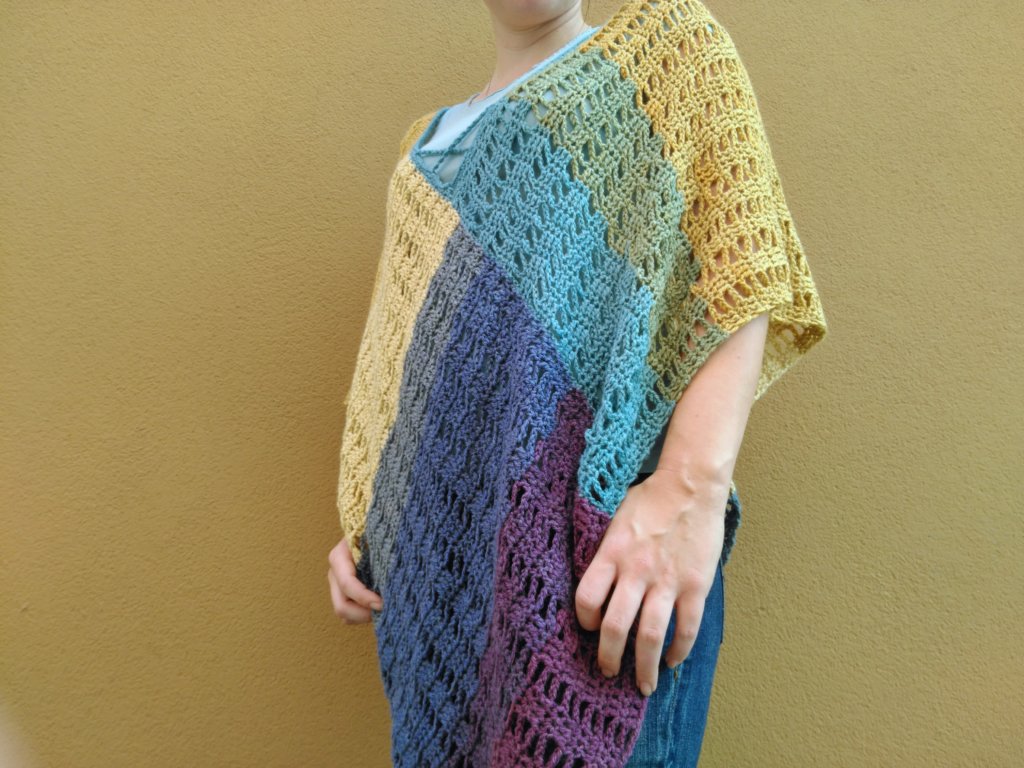
The Athena Poncho is light and airy enough to wear in the warmer months and yields just enough warmth to layer and keep you warm in the colder months.
Inspiration
Did you ever freeze your ass off in school like I always did? I was always cold! Now I know this isn’t your traditional ‘back-to-school’ make but I promise it was intentional! This poncho was designed to be light enough to wear all year long but still have a bit of warmth to layer it to keep warm.
The name ‘Athena’ came from the colorway of yarn I used: ‘Zeus.’ I was searching for an inspiring name and started looking for a goddess name that would suit it well. Athena was Zeus’ daughter and was the goddess of wisdom and war. Seems fitting, right?
About The Yarn
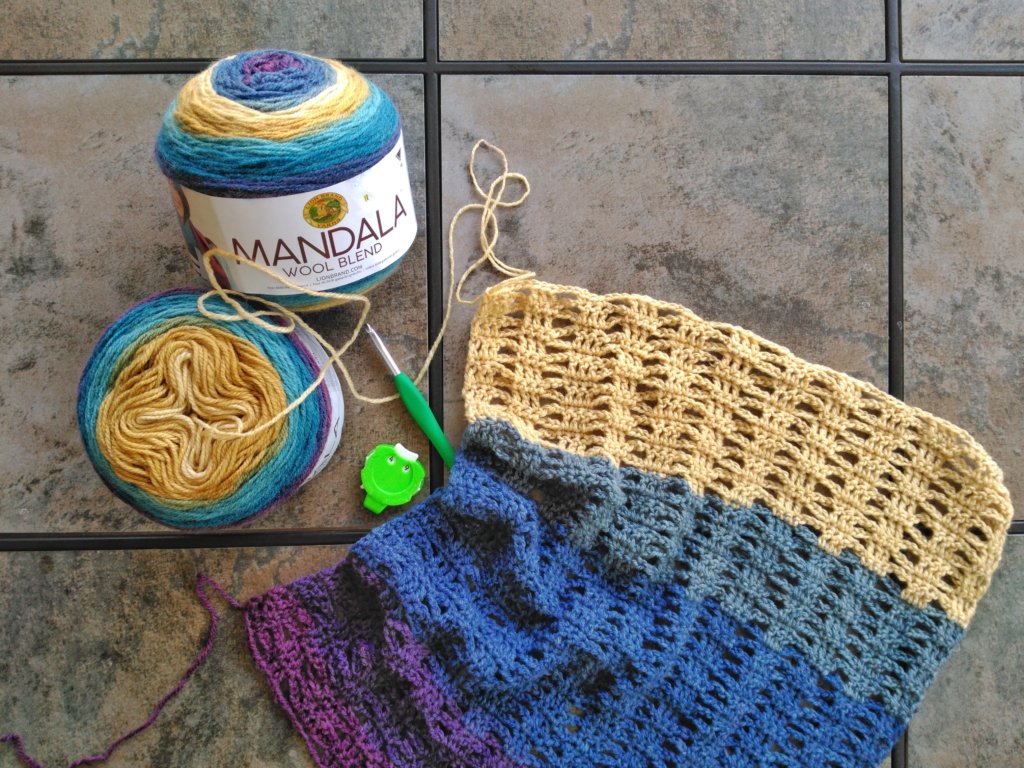
The Lion Brand Mandala Wool Blend line is a #3/DK/lightweight yarn. I used a larger hook to give it lots of drape. I love all the beautiful colorways this yarn comes in but this poncho would look gorgeous in any solid color as well!
You could easily substitute any #3/DK/lightweight yarn you like. Some other yarns I would recommend are:
Lion Brand Coboo <–This yarn is super soft and has the MOST amazing drape! Careful though, I’ve heard it stretches quite a bit after washing.
Lion Brand 24/7 Cotton <– This one is categorized as a worsted weight but everyone I’ve seen talk about it agrees that it’s much closer to a DK weight.
Lion Brand Ice Cream <– This is a gorgeously faded DK yarn that would be perfect for this project.
Bernat Softee Baby Cotton <– This is my favorite DK cotton blend yarn EVER!
Premier Yarns Bamboo Fair <– A bamboo/cotton blend that’s sure to work up beautifully for any garment.
Techniques Used
All of the techniques used in this pattern are beginner-friendly! The only stitches used are chains, single crochets, and double crochets so no fancy stitchwork here 😉 It’ll have you loving lace in no time!
Skill Level
Beginner
Gauge
(with 5.5mm hook)
Before blocking: 15 sts and 12 rows of pattern is 4″ (10cm)
After blocking: 16 sts and 9 rows of pattern is 4” (10cm)
Materials
750-1800 yards Lion Brand Mandala Wool-Ease
US Size I/9/5.5mm crochet hook
US Size H/8/5mm crochet hook
Tapestry needle for weaving in ends
Scissors
Finished Measurements
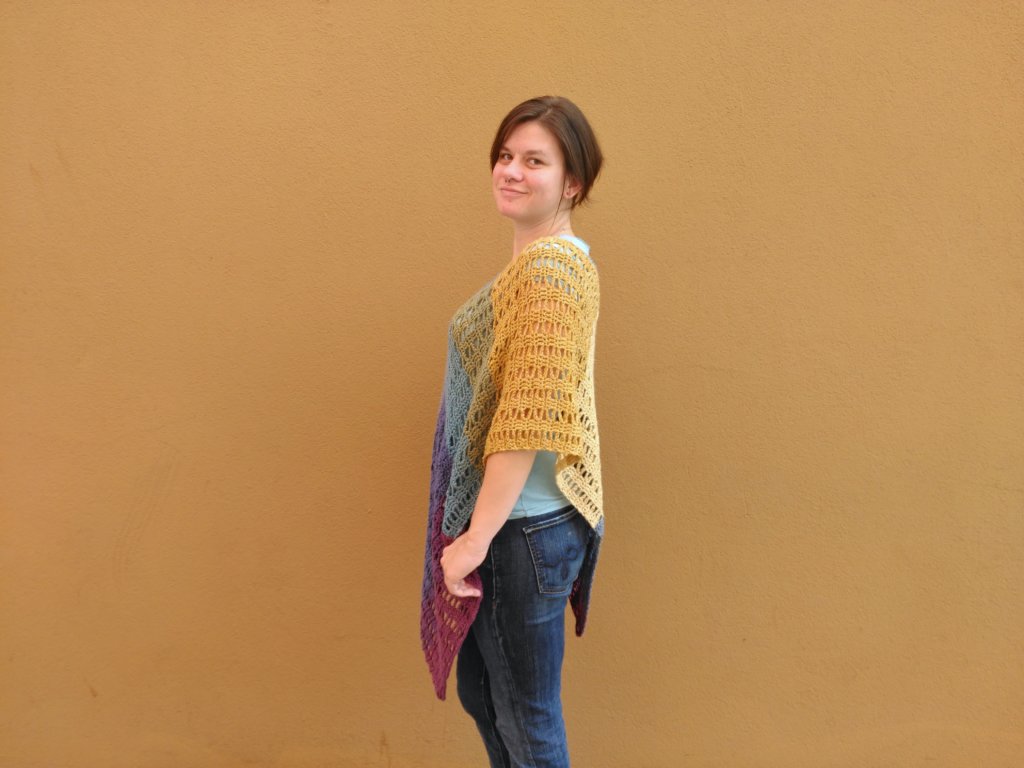
All measurements are taken of each panel before seaming and after blocking. All finished sizing is based on Craft Yarn Council’s Standard Women’s Size Chart that can be found HERE. The finished poncho is intended to be oversized. The model in the photos is wearing the S/M and is 5’5” and 130lbs for reference.
XS 15.5” wide and 37” long
S/M 18” wide and 39” long
L/XL 23” wide and 39” long
2X/3X 25.5” wide and 41” long
4X/5X 30.5” wide and 41” long
Notes
-Pattern is written as follows: XS (S/M, L/XL, 2X/3X, 4X/5X)
-* * indicates a repeat
-(xx) at the end of a row/round indicates how many total stitches for that row/round
Stitch Index
R-row/round
inc-increase
dec-decrease
ch-chain
ch-sp-chain space
st(s)-stitch(es)
sk-skip
PM-place marker
sl st-slip stitch
sc-single crochet
sc3tog-single crochet 3 sts together (insert hook into 1st st and pull up a loop, insert hook into 2nd st and pull up a loop, insert hook into 3rd st and pull up a loop, yo and pull through all 4 loops on hook)
dc-double crochet
Pattern
Panels (make 2)
Foundation (with 5.5mm hook) ch 58 (70, 94, 106, 118)
R1 (working in the back bumps of your base ch) [sc, LOOSELY ch 1 (counts as 1 dc)] in the 2nd ch from your hook, dc in the next 2 ch, ch 3, sk 3 ch, *sc in the next 3 ch, ch 3, sk 3 ch, dc in the next 3 ch, ch 3, sk 3 ch* repeat from * to * until 3 ch remain, sc in the last 3 ch, do not ch, turn
R2 [sc, LOOSELY ch 1 (counts as 1 dc)] in the 1st sc, dc in the next 2 sc, ch 3, sk 3 ch, *sc in the next 3 dc, ch 3, sk 3 ch, dc in the next 3 sc, ch 3, sk 3 ch* repeat from * to * until 3 sts remain, sc in the last 3 sts, do not ch, turn
R3-94 (99, 99, 104, 104) repeat R2, break yarn leaving a tail approximately 36” (91cm) for seaming
Block both of your panels (I hung and steam blocked mine)
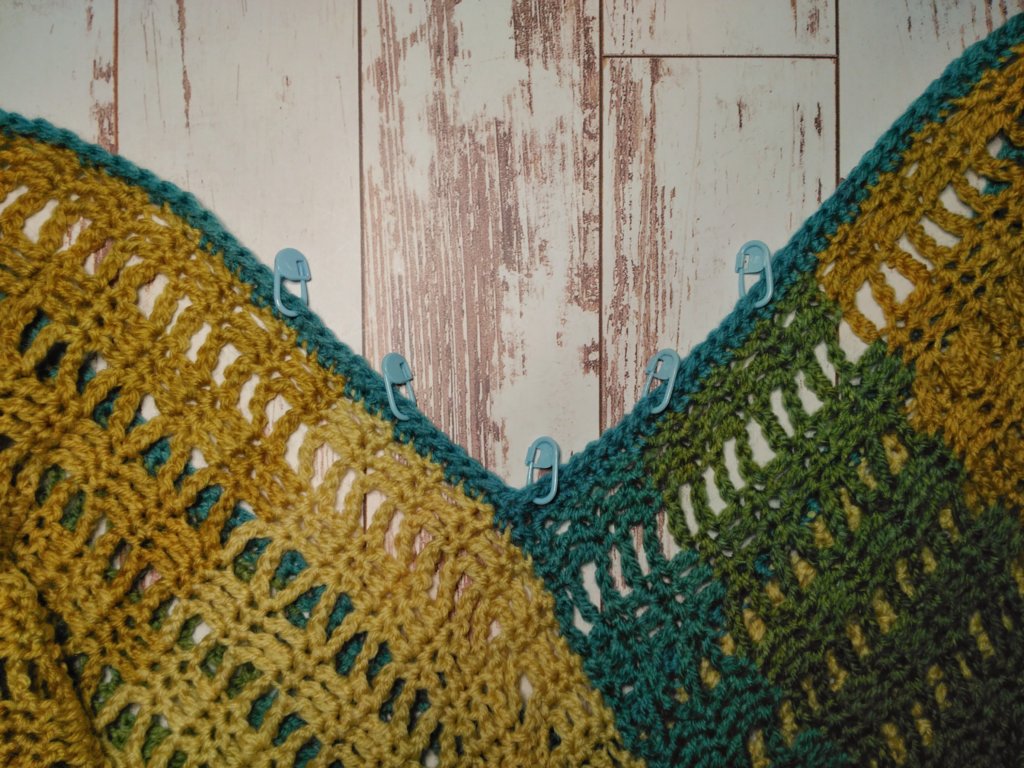
Seaming
Seam your panels together as seen in the photo below. The white arrows point to where your long seaming tail is. One seam will start on the outside and you will work your way to the inside and the other will start on the inside and you will work your way to the outside. You should seam stitch for stitch, lining them up evenly (one dc will count as 2 seam sts). I used a few stitch markers to make sure I was staying lined up as I seamed.

Neckline Trim (all sizes)
R1 (with 5mm hook) Attach a new strand of yarn one stitch to the right of either center V seam with a sc, sc3tog [over the next st, center of seam, and the next st] (PM in sc3tog to mark the center of the V), place 1 sc at the end of each sc row and 2 sc at the end of each dc row until 1 st remains before the next center V seam, sc3tog [over the next st, center of seam, and the next st] (PM in sc3tog to mark the center of the V), place 1 sc at the end of each sc row and 2 sc at the end of each dc row to beg of round, join with a sl st to the beg sc, ch 1, do not turn
R2 sc3tog over the next 3 sts (PM in sc3tog to mark the center of the V), sc in each sc until 1 st remains before next marker, sc3tog over the next 3 sts (PM in the sc3tog to mark the center of the V) sc in each sc to beg of round, join with a sl st, break yarn
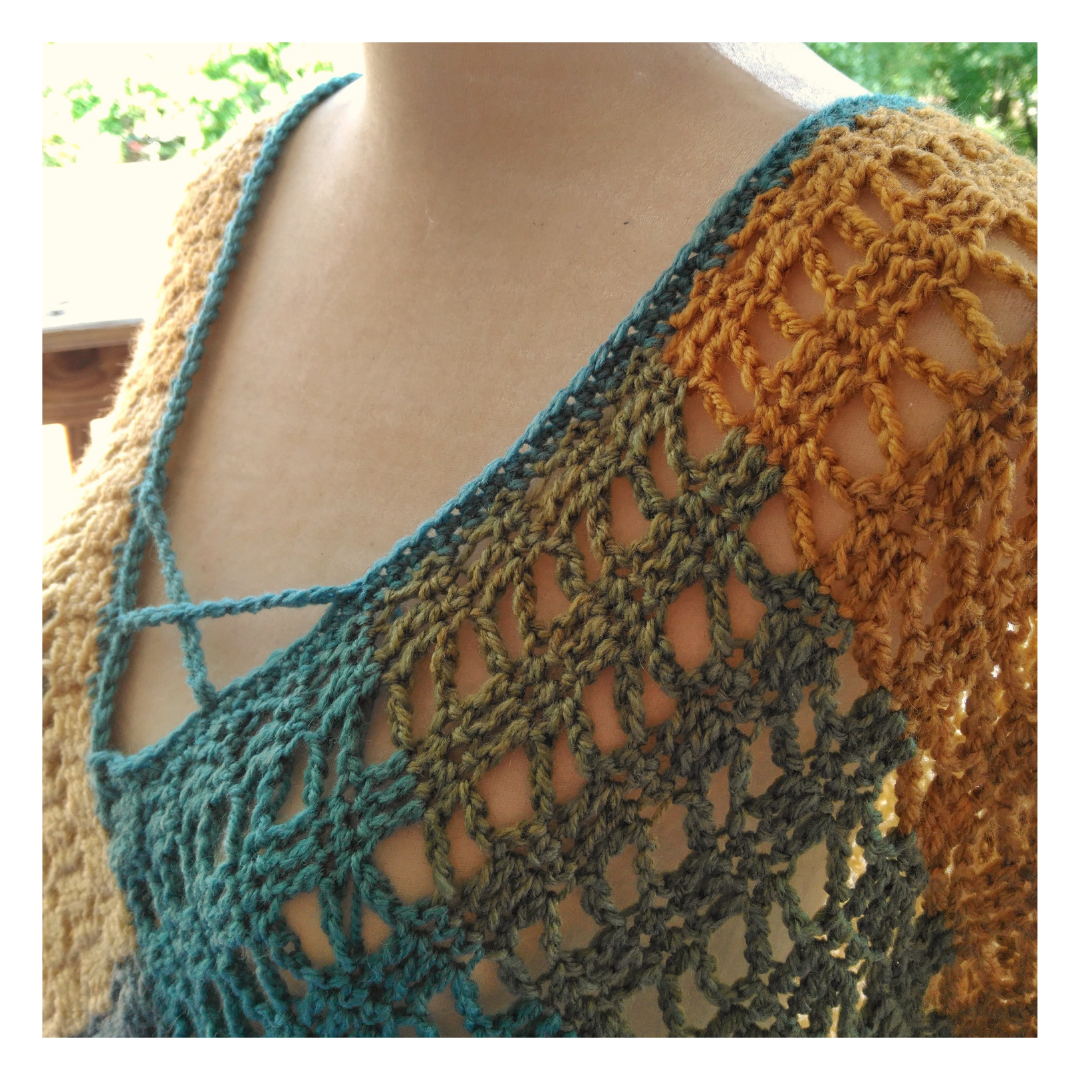
Chain ‘X’ Neckline Accent
Place markers as follows:
From the front center marker (pick which side you want to be the front, they should be symmetrical), PM 7 and 14 sts away from the center on each side as seen in the photo below
Chains to create the ‘X’ (make 2):
With a new strand and leaving about an 8” (20cm) tail before starting for weaving, ch 16, break yarn leaving a tail about 8” (20cm) for weaving.
Attach each strand in an ‘X’ shape with a tapestry needle and weaving the ends at the same time. I pulled the chain through the marked st enough so that the knot wouldn’t show and adjusted them as attaching so that the chain would lay flat and not be twisted.
Weave in your ends and you’re finished!
As always, this crochet poncho pattern will remain free on the blog forever, with ads. Click here if you’d like to purchase a color coded, ad-free, and easy to read PDF.
Happy making, friend!
2 Comments
Michelle
Very pretty! Thank you for the pattern. Pinning!
Chantal Barnett
Thank you very much, Michelle!