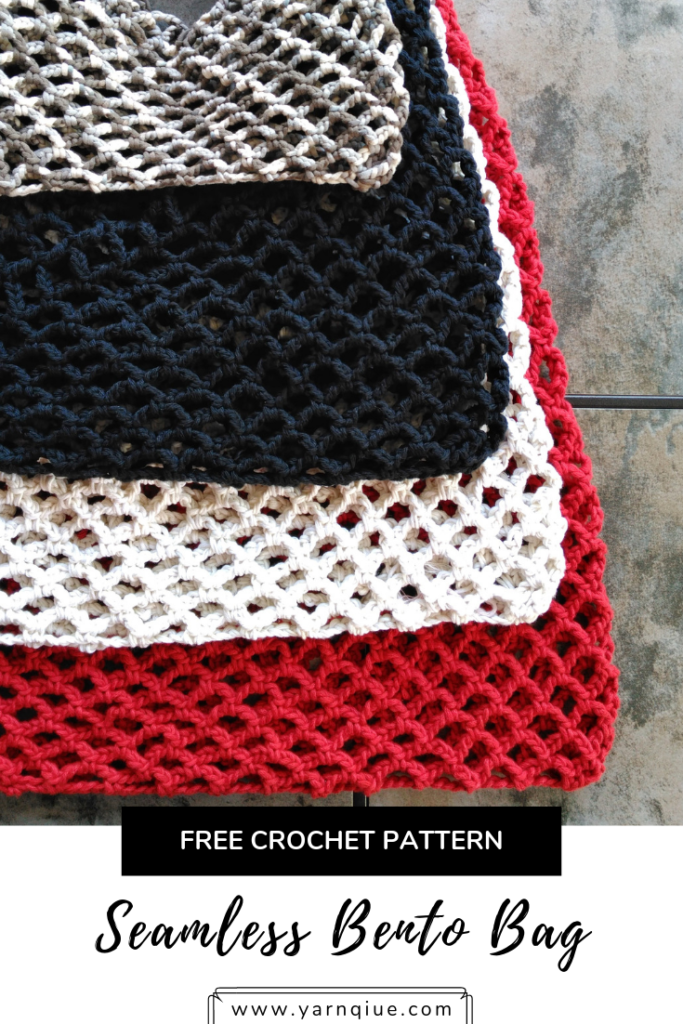
Seamless Bento Bag (Free & Easy Crochet Pattern)
Have you ever seen a Bento bag? If you haven’t, it’s just a long rectangle that you fold and seam into a bag. Pretty neat, huh?
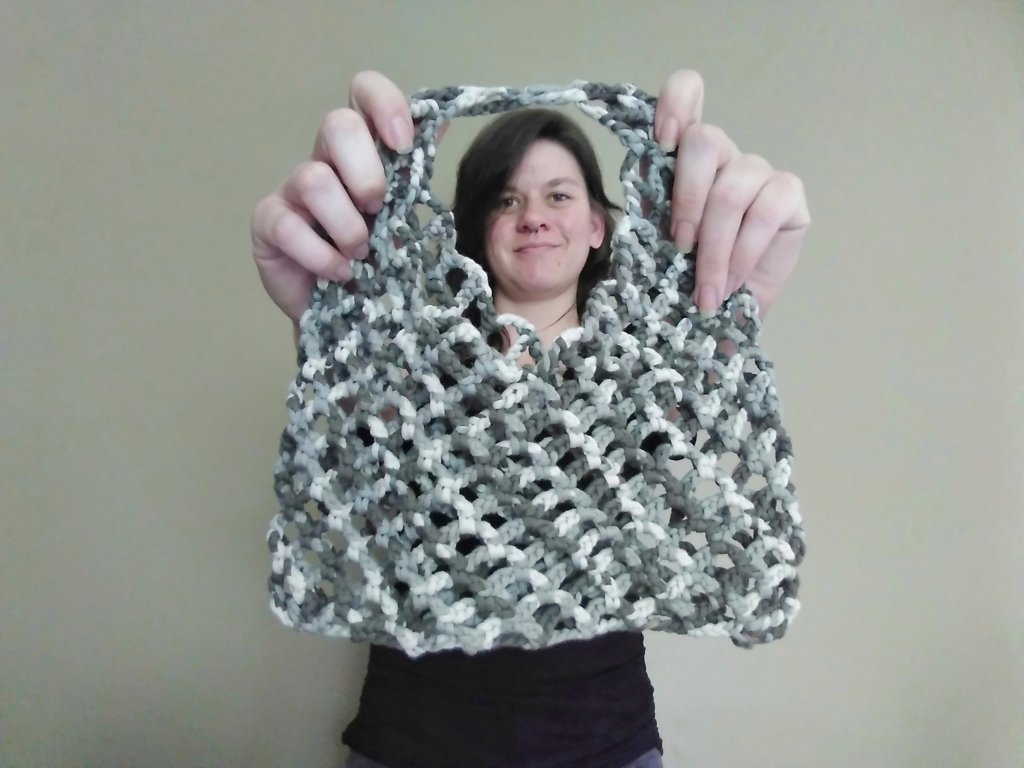
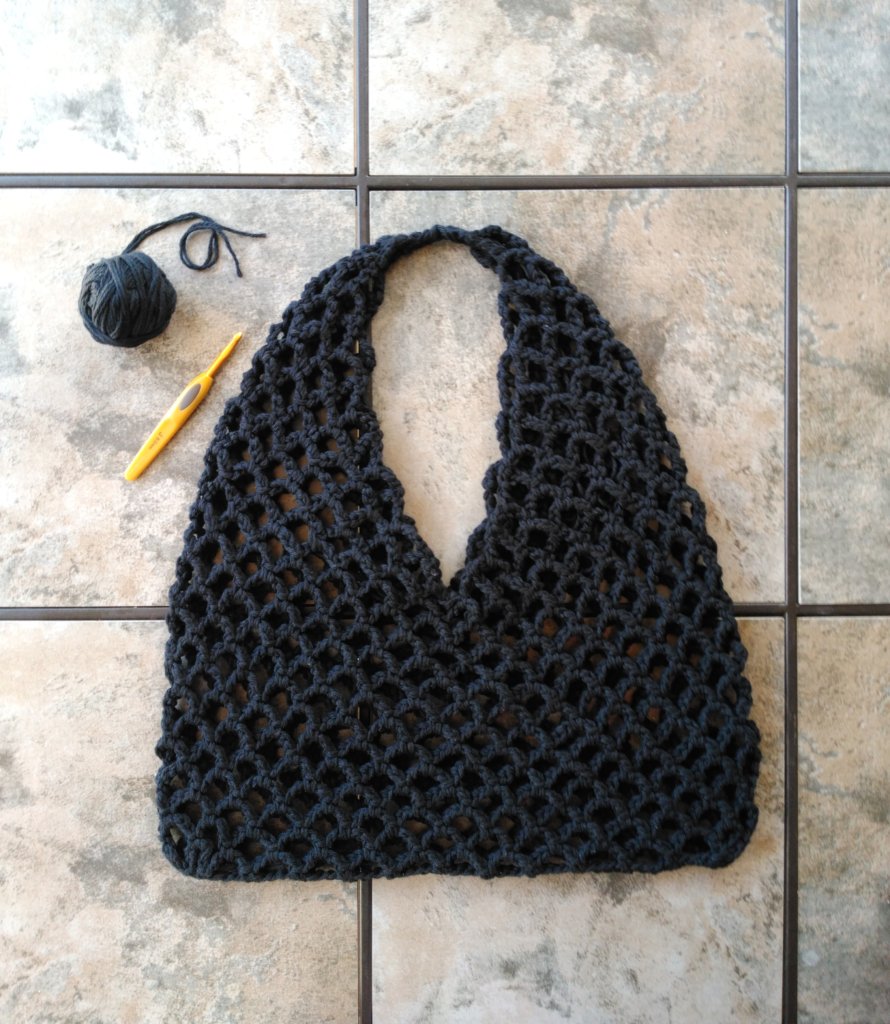
This is the same basic look but now you can get it without the seaming! Meet the Seamless Bento Bag crochet pattern.
Scroll to find the completely free full written pattern (with ads of course) or purchase an affordable, easy to read PDF on Ravelry, Etsy, or LoveCrafts.
Inspiration
The inspiration for this bag came from a few specific photos I came across while browsing Pinterest one night. I was just scrolling and clicking and scrolling and clicking and… You feel me, right? 😉 I was also working on my Free Crochet Patterns for Your Next Fall Market roundup post at the time.
This bag just flowed off of my hook that night. I just love when crochet patterns come together so beautifully!
About The Yarn
I used double strands of Lily Sugar N’ Cream cotton yarn for my bags but there are endless yarn possibilities for this one.
The extra-large red one I made is actually Wool and the Gang’s Cotton XL (#5 bulky weight yarn) which I believe is discontinued now. There aren’t a ton of them, but there are some bulky weight cotton yarns out there if you don’t particularly enjoy using double strands of yarn.
Pro Tip: Typically, double strands of a worsted weight yarn are equivalent to a single strand of bulky weight yarn.
Some other yarns I would recommend are:
- Lion Brand 24/7 Cotton (doubled)
- Peaches & Creme (doubled)
- I Love This Cotton! (doubled)
- Red Heart Super Saver (doubled)
- Premier Home Cotton (doubled)
- Yarn Bee Cotton XXL (single stranded)
Usage
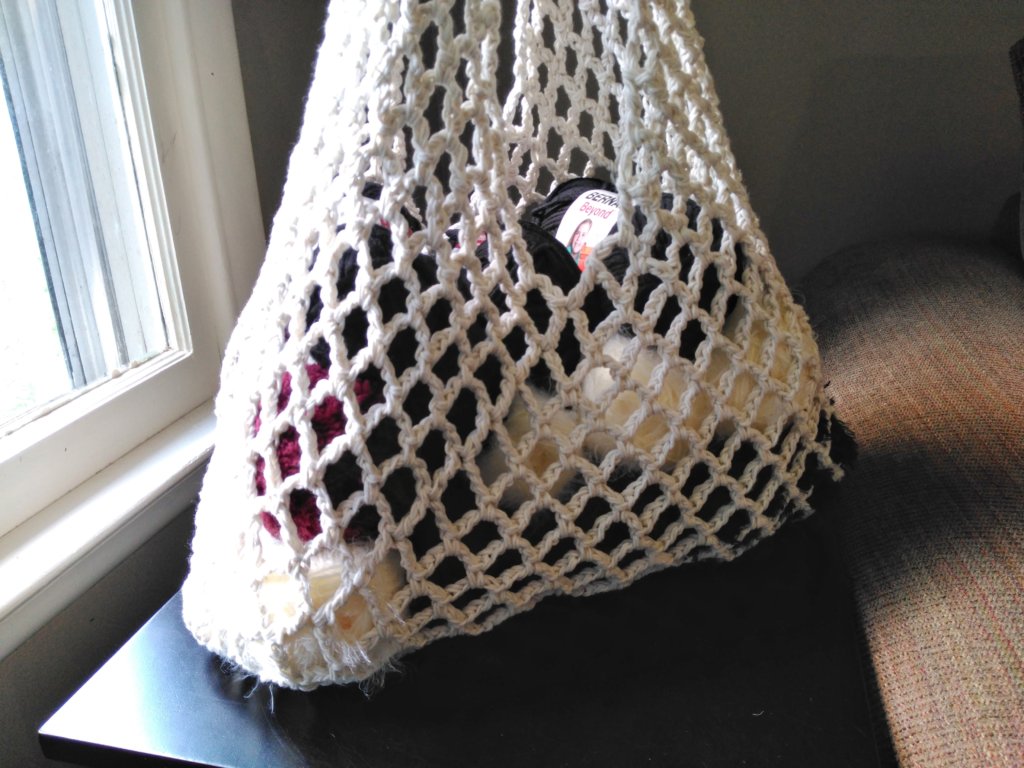
I love how versatile this bag is. It can’t be used for smaller items for obvious reasons, but if you added a fabric lining, you could use it for anything.
I love using mine for larger produce, books at the library, beach trips, and more. Written in four different sizes, you’ll find tons of uses for yours also!
Techniques Used
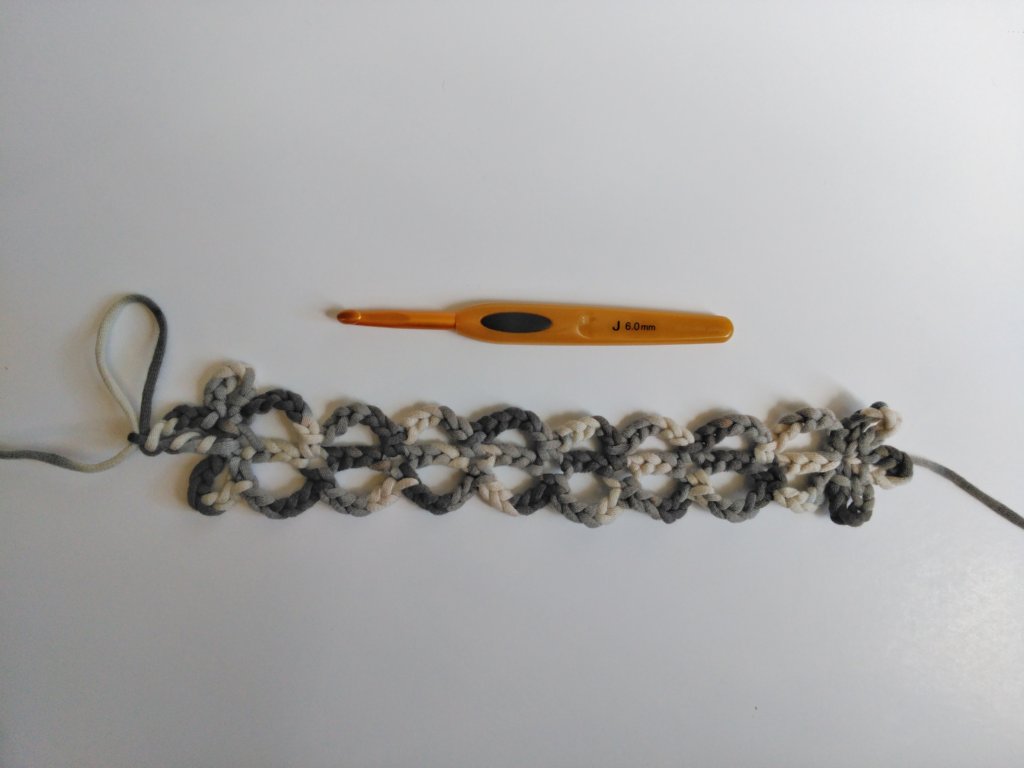
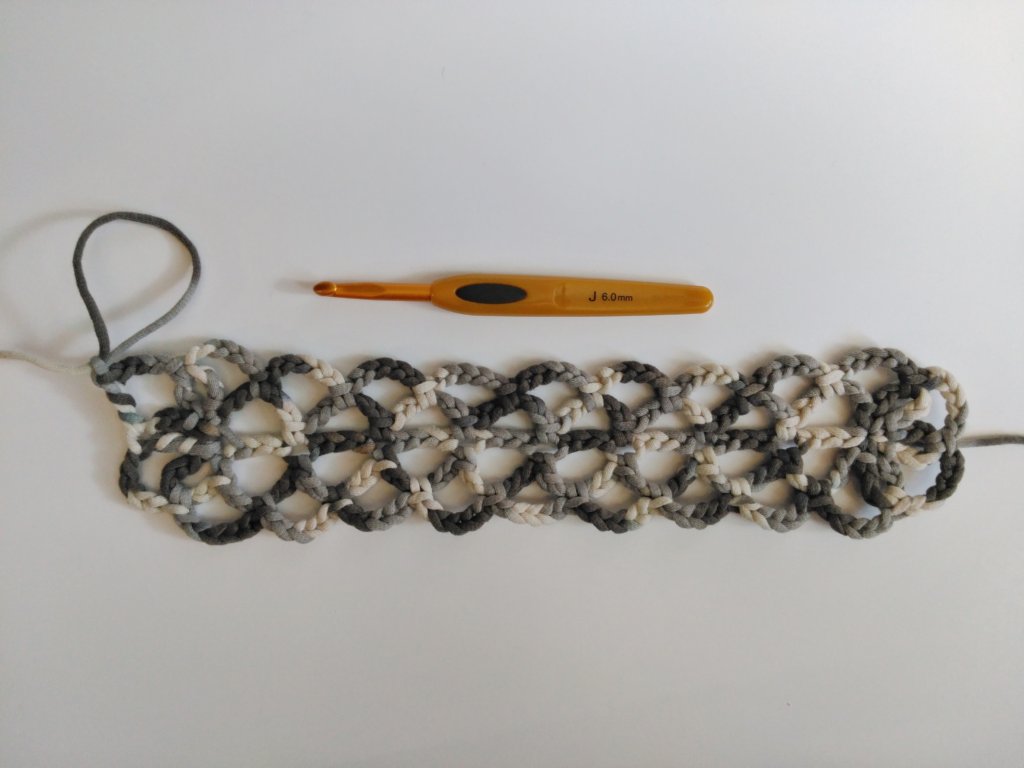
This bag is intended to be super beginner friendly. It does use treble crochets (see Stitch Index for explanation) but there’s only one of those per round so don’t let that put you off!
Other than that, the entire bag is made using chains and single crochets. I’ve included lots of photos here if you’re more of a visual learner.
Skill Level
Beginner
Gauge
Not only is gauge not important for this project but there really is no good way to swatch for this pattern as it’s comprised entirely of mesh. See the approximate finished measurements of each size below.
Finished Measurements
Finished measurements are approximate as there is so much stretch every way with this bag. I’ve given the measurements for each size laid flat, before any stretching with usage and from the base of the bag to the top of the handle.
- S: 12” (30cm) wide x 12” (30cm) tall
- M: 17″ (43cm) wide x 18″ (46cm) tall
- L: 20″ (51cm) wide x 22″ (56cm) tall
- XL: 22″ (56cm) wide x 26″ (66cm) tall
Materials
Approximately 90, 210, 360, 425 g/175, 225, 275, 350 yards (total) of worsted weight yarn doubled OR a single strand of bulky weight yarn (see above for information about the yarn I used and some yarn recommendations and substitutions.)
US Size J/10/6 mm crochet hook
2 Stitch markers
Tapestry needle for weaving in ends
Scissors
Notes
– Keep a tight tension throughout the pattern.
– PM at the end of each round. It’s very easy to pass it up and keeping working without joining.
– Pattern is written in the smallest size with the larger sizes in parentheses. Example: S (M, L, XL)
– * * indicates a repeat
– (xx) at the end of a row/round indicates how many total stitches for that row/round
Stitch Index
R – row/round
ch – chain
ch-sp – chain space
st(s) – stitch(es)
sk – skip
PM – place marker
sc – single crochet
tr – treble crochet (yo 2x, insert hook and pull up a loop, *yo, pull through 2 loops* 3 times
Pattern
Foundation ch 39 (51, 59, 75)
R1 sc in the 7th ch from your hook, *ch 5, sk 3, sc in the next ch* repeat from * to * to the 1st ch made, **ch 6, sc in the same st** repeat from ** to ** 2 times, repeat from * to * across the other side of your ch ending at the ch with your 1st sc in it, ch 6, sc in the same st, ch 3, tr in the same st, do not turn (22, 28, 32, 40 ch-sp)
R2 *ch 5, sc in the next ch-sp* to the last ch-sp before your marker, ch 3, tr into the top of the joining tr from the previous round (22, 28, 32, 40 ch-sp)
R3-10 (13, 14, 18) repeat R2
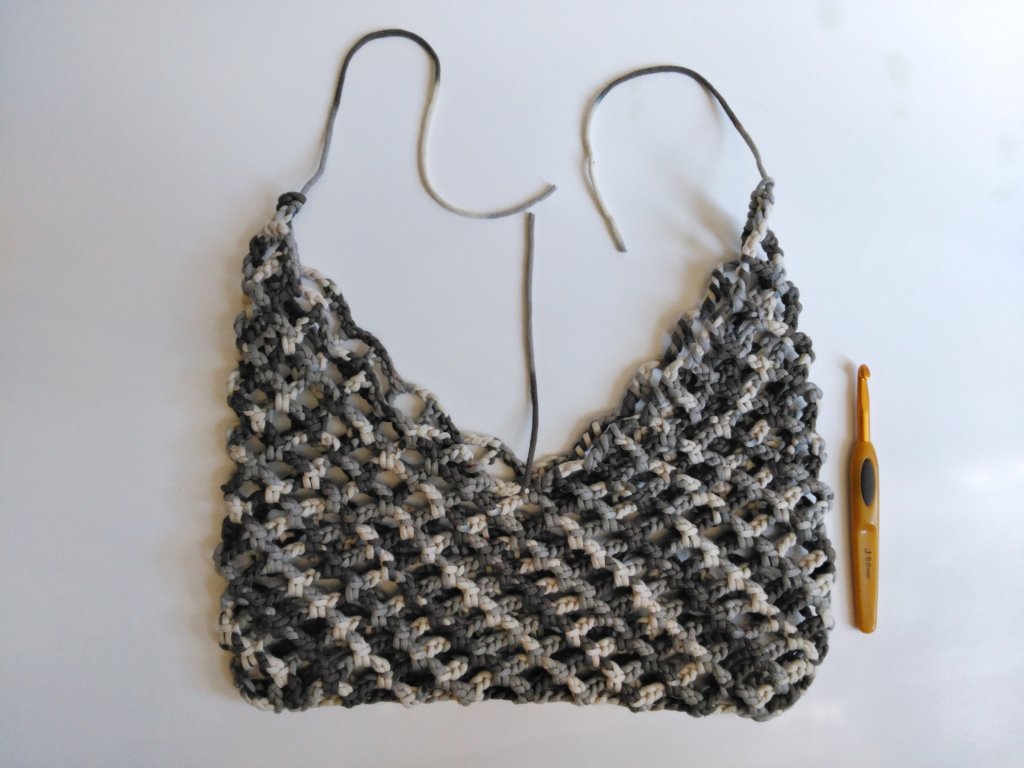
R11 (14, 15, 19)A *ch 5, sc in the next ch-sp* repeat from * to * 10(13, 15, 19) times, ch 3, tr in the next ch-sp, leave remaining sts unworked, TURN YOUR WORK, you will now work in rows instead of rounds (11, 14, 16, 20 ch-sp)
Note: PM at the beginning and end of each row here and throughout
R12 (15, 16, 20) *ch 5, sc in the next ch-sp* repeat from * to * until 1 ch-sp remains, ch 3, tr in the next ch-sp, turn (10, 13, 15, 19 ch-sp)

Repeat R12 (15, 16, 20) until 2 ch-sp remain
Final row (all sizes) ch 3, tr in the next ch-sp (1 ch-sp), break yarn leaving an 8″ tail for finishing
With the non seam (the ‘seam’ is where the joins at the end of each round are) side facing, attach a new strand of yarn into the base of the last tr made on R11(14, 15, 19)
R11 (14, 15, 19)B *ch 5, sc in the next ch-sp* repeat from * to * 10(13, 15, 19) times, ch 3, tr into the top of the joining tr of the previous round
Repeat R12 (15, 16, 20) to end
Using the long tails, figure 8 the tail around and through the last ch-sp of both ends to secure and making a knot after weaving your tail a bit.
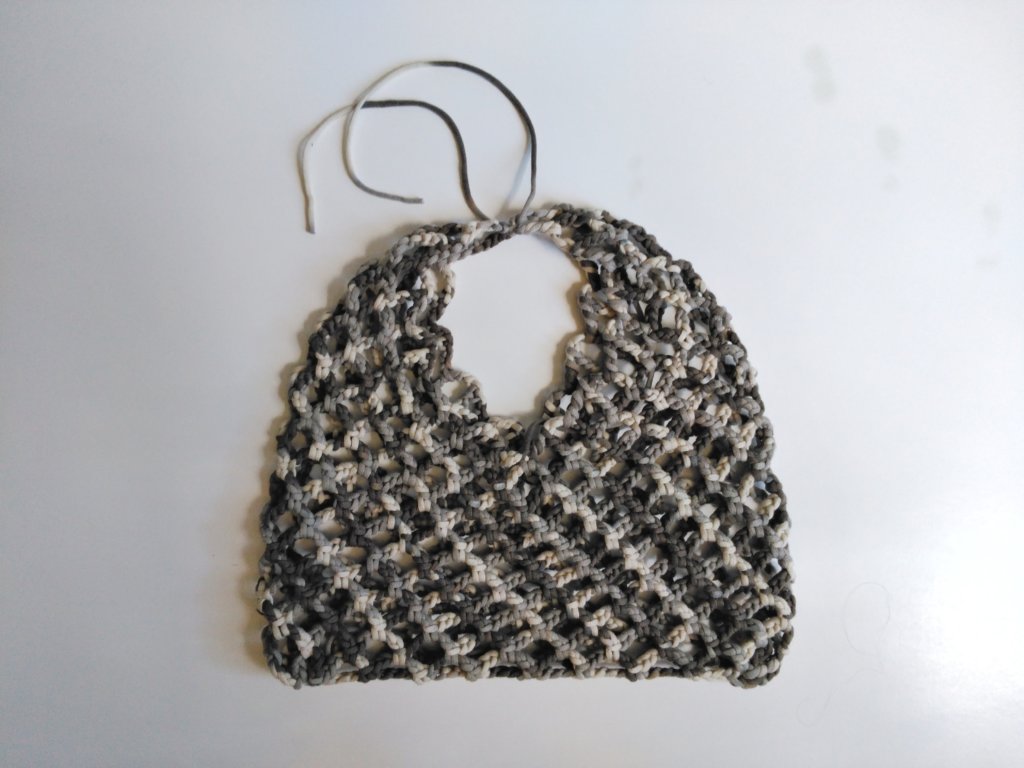
Weave in your ends and that’s it!
Final Thoughts on Seamless Bento Bag Crochet Pattern
I really hope you enjoyed this bento inspired Seamless Bento Bag crochet pattern! I particularly love how fast and easy this one is.
I’ll be adding this one to my market lineup this year for sure! If you’ve ever (or may ever!) participated in craft fairs or markets check out my Free Crochet Patterns for Your Next Fall Market roundup post. It’s packed with tons of useful information and awesome makes.
Sharing is caring and a great way to support small businesses like mine at no additional cost! Bookmark this blog post or pin it to your favorite Pinterest board for later and to share with your friends.
Happy crocheting!
Bloggers: I would love for you to feature my work in a roundup! You may use one photo and link directly to my blog for the free pattern. Send me an email at yarniqueblog@gmail.com with a link to your post so I can share it with my followers.
PLEASE READ: THIS PATTERN AND ITS CONTENTS ARE THE SOLE PROPERTY OF YARNIQUE (CHANTAL CAMPSEY) AND MAY NOT BE ALTERED, SOLD, OR REDISTRIBUTED IN ANY WAY WITHOUT PERMISSION FROM ITS AUTHOR. YOU MAY, HOWEVER, SELL AS MANY FINISHED PROJECTS AS YOU DESIRE, I JUST ASK THAT YOU REFERENCE MY BLOG AND/OR SHOPS FOR CREDIT FOR THE PATTERN.