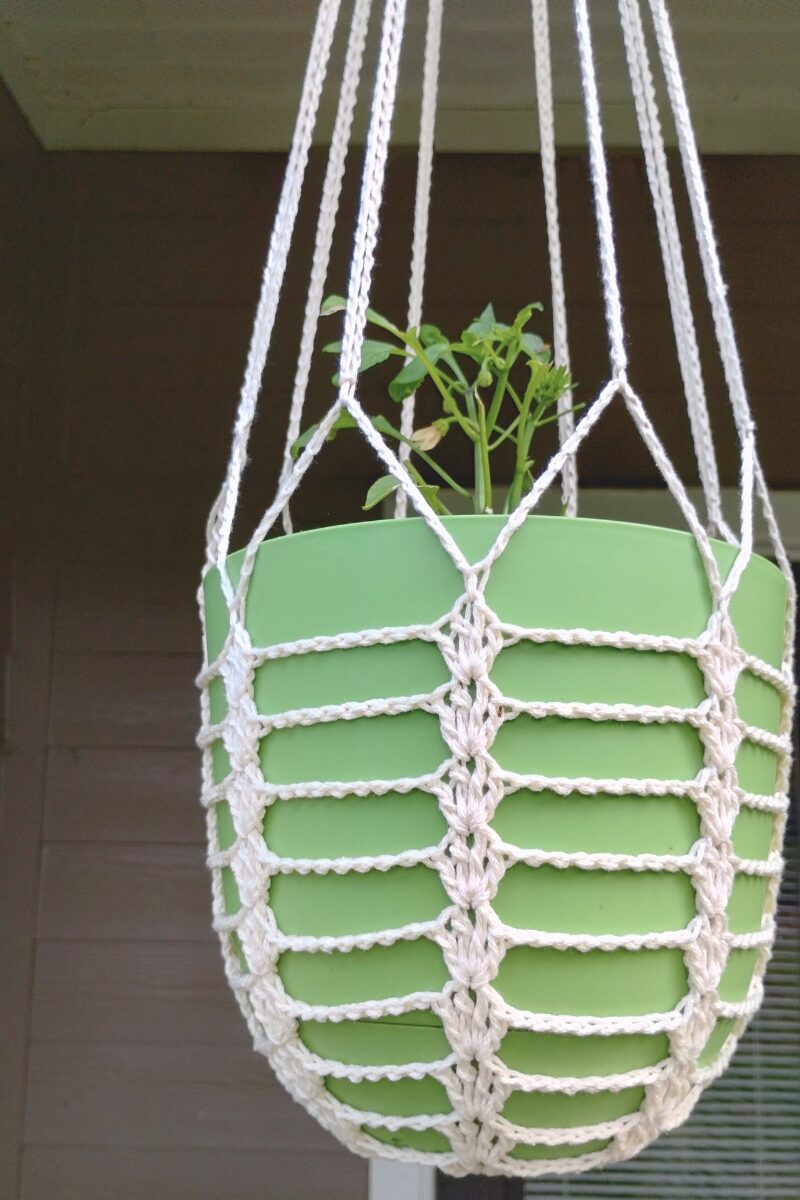
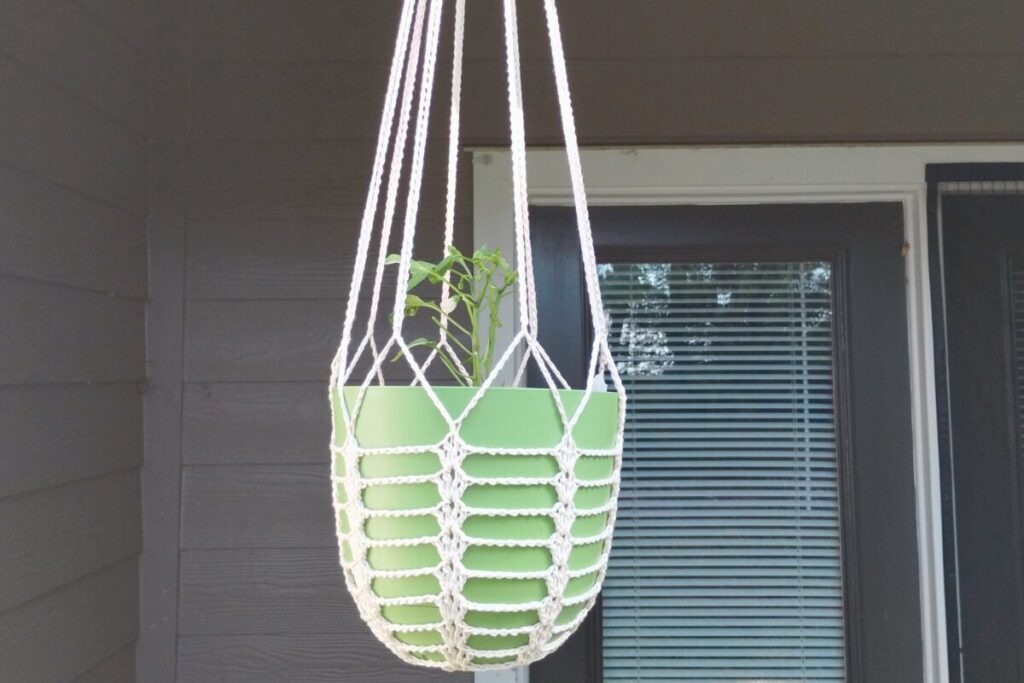
Iris & Chains Crochet Plant Hanger (Free Pattern)
If you’re looking for a trendy crochet plant hanger pattern, you’ve come to the right place! Today I’m sharing a free pattern for the Iris & Chains Crochet Plant Hanger pattern. Scroll to read about the design process and the pattern.
As always, the pattern will remain free on the blog forever, with ads. Click here if you’d like to purchase an ad-free and easy to read PDF.
This post contains affiliate links. As an Amazon Associate I earn from qualifying purchases. Click here to see my disclosure policy.
Inspiration
Confession: I’m not a plant person. Not in the sense that I don’t like them but in the sense that I kill them. I love plants, but I’ve killed every one of them that I’ve owned. I came to the decision some time ago that nature doesn’t deserve that from me, and I can admire them from afar. I actually borrowed this plant from my neighbor to make this hanger and photograph it. You can laugh now.
The inspiration to make this free crochet plant hanger pattern did come from my love of nature…and Pinterest. I’ve seen so many gorgeous macrame designs and crochet patterns and decided I wanted to create my own version. The stitch design inspiration for this free crochet pattern came mostly from macrame designs I’ve seen. It was one of those ‘inspiration-struck-and-I-must-act-upon-it-now’ situations.
I knew I had some sturdy cotton yarn in my stash that would be perfect for this project, so I grabbed a skein of 24/7 cotton and got to work.
About the Yarn
I used Lion Brand Yarn 24/7 Cotton for my crochet plant hanger which is a solid choice for a sturdy cotton yarn. I’ve used it for several projects since its release and it has become the best yarn for projects needing stability in my opinion. Did you know Lion Brand made a DK version of 24/7? I literally just found this out while looking on their website and will have to hunt some down now!
The size I made used a little over a half skein of yarn. Since it doesn’t use much yarn, this design is an excellent choice for stash busting. If your stash diving, the type of yarn you use does matter. Look for a cotton or cotton blend yarn for best results. I do not recommend using acrylic yarn for this project; however, it may work well for you.
Using Your Crochet Plant Hanger
One of the things I love about this crochet plant hanger is its versatility in your own home. Yes, it’s designed to be a plant hanger specifically, but it can also be used for decorative bowls in your home decor or even for stuffies.
The hanging loop can be attached to any type of hook large enough or on a nail. This adorable crochet plant hanger is also great for gifting. With Mother’s Day right around the corner, surprise your mom or mother figure with a cute and functional gift they’ll love.
Techniques Used
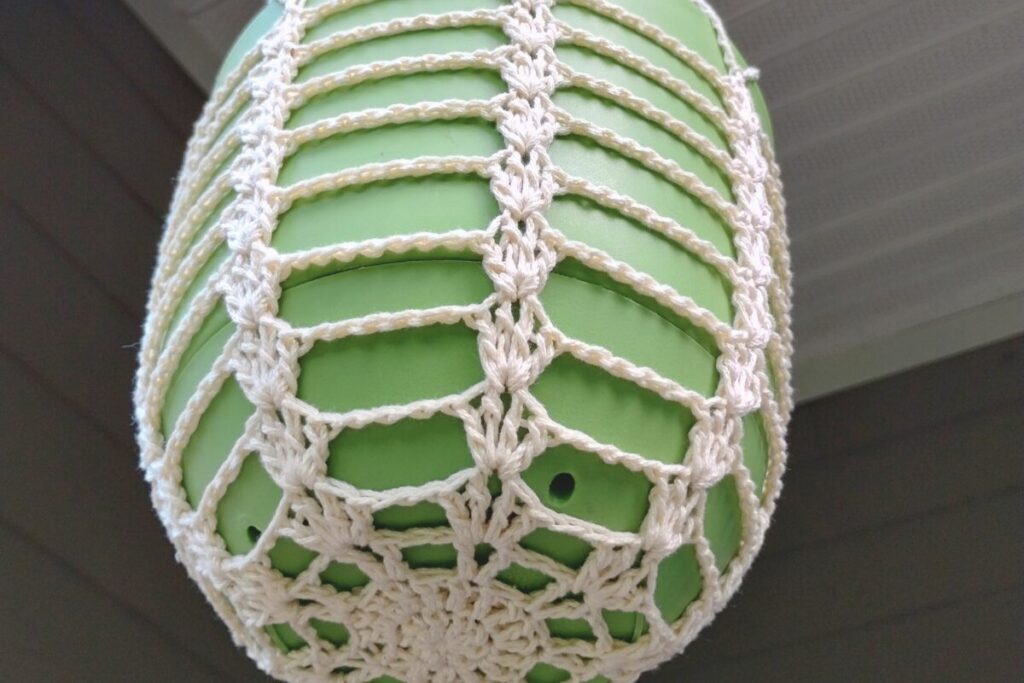
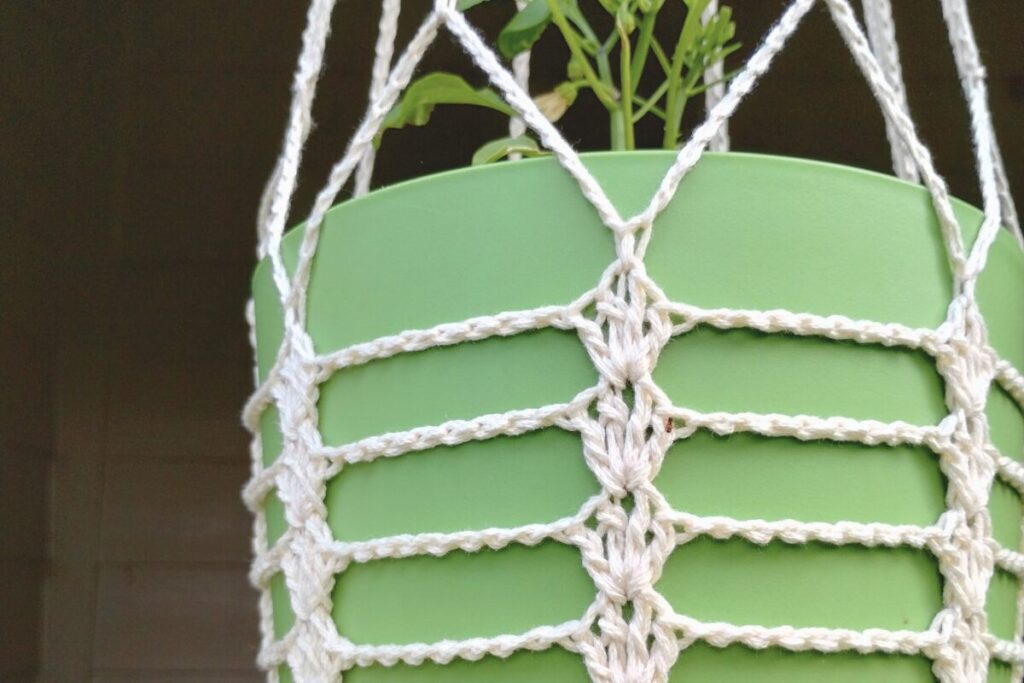
This easy plant hanger crochet pattern uses mostly basic crochet stitches. There is an extra tall crochet stitch in the design, but it’s just the one. The rest of the pattern consists of single crochet stitches, double crochet stitches, and long chains to create that macrame look.
If you get hung up on the extra tall crochet stitch, make sure to check out the video tutorial for guidance (coming soon, I’m currently editing it!). This is a great project for practicing an extra tall crochet stitch if you’re new to them. You may need to redo it a few times until you’re satisfied with how it looks, but it’s worth it!
Skill Level
Easy
Gauge
16 sts and 9 rows of dc is 4″ x 4″ (10x10cm)
Note: Gauge is not very important for this project. I’ve included mine for reference.
Finished Measurements
Pattern is written to fit an 8” x 7” pot. See Notes section for how to customize your plant hanger to fit different sized pots.
Materials
1 ball Lion Brand Yarn 24/7 Cotton
OR
57 grams/106 yards worsted weight cotton yarn
US Size 7/4.5 mm crochet hook (this is the exact one I use in the video tutorial (coming soon, I’m currently editing it!)
Tapestry needle for weaving in ends
Scissors
Notes
– This design can easily be customized for different sized pots. The base and increase rows should be a little smaller than the plant pot itself as the stitches are very stretchy.
For smaller pots, you’ll stop increasing sooner and continue rows with the same number of chains between each DVST. For larger pots, you’ll increase more than the pattern calls for, increasing by 2 chains between each DVST per round.
For shorter or taller pots, you want your last row to come up to about 1-2 inches from the top of the pot. Using the physical pot for size reference is key. Keep it mind it will stretch a lot once it’s hung.
If you’d like it to hang higher or lower, adjust the number of chains in the last round accordingly.
– * * indicates a repeat
– [ ] indicates a repeat of all within brackets
– (xx) at the end of a row/round indicates how many total stitches for that row/round
Stitch Index
R – row/round
BOR – beginning of row/round
ch – chain
ch-sp – chain space
st(s) – stitch(es)
sk – skip
sl st – slip stitch
sc – single crochet
dc – double crochet
SeptTr (Septuple Treble Crochet) – yo 8x, insert hook and pull up a loop, *yo, pull through 2 loops* 9 times
Special Stitches
VST (V-stitch) – (dc, ch 1, dc) all in indicated stitch
DVST (Double V-stitch) – (2 dc, ch 1, 2 dc) all in indicated stitch
Crochet Plant Hanger Pattern
Foundation/R1 in a magic circle, ch 2 (does not count as a st), 8 dc, join with a sl st (8)
R2 [sc, loosely ch 1 (counts as 1 dc), dc] all in joining st, 2 dc in each remaining st around (16)
R3 [sc, loosely ch 1 (counts as 1 dc), ch 1, dc] all in joining st, ch1, sk 1 st, *VST, ch 1, sk 1 st* repeat from * to * around, join with a sl st (8 VST)
R4 sl st in next VST ch-sp, [sc, loosely ch 1 (counts as 1 dc), dc, ch 1, 2 dc] all in same ch-sp, ch 2, sk 1 ch-sp (between previous row’s VSTs), *DVST in next ch-sp, ch 2, sk 1 ch-sp* repeat from * to * around, join with a sl st (8 DVST)
R5 sl st next dc, sl st in next DVST ch-sp, [sc, loosely ch 1 (counts as 1 dc), dc, ch 1, 2 dc] all in same ch-sp, ch 4, *DVST, ch 4* repeat from * to * around, join with a sl st (8 DVST)
R6 sl st next dc, sl st in next DVST ch-sp, [sc, loosely ch 1 (counts as 1 dc), dc, ch 1, 2 dc] all in same ch-sp, ch 6, *DVST, ch 6* repeat from * to * around, join with a sl st (8 DVST)
R7 sl st next dc, sl st in next DVST ch-sp, [sc, loosely ch 1 (counts as 1 dc), dc, ch 1, 2 dc] all in same ch-sp, ch 8, *DVST, ch 8* repeat from * to * around, join with a sl st (8 DVST)
R8-11 repeat R7 (8 DVST)
R12 sl st next dc, [sl st, sc] in ch-sp, ch 19, sk 1 ch-sp, sl st in next ch-sp (center of DVST), *ch 20, sk 1 ch-sp, sl st in next ch-sp* repeat from * to * 6 times, ch 10, yo 8x, yo pull through 2 loops 9x, sl st to join
R13 *ch 200, sl st next ch-sp* repeat from * to * around joining with a sl st to the BOR, break yarn and weave in ends
Finishing
I find the finishing to be easier with the plant pot in the holder. This makes it easier to get the tension as consistent as possible. Do what works best for you. Gather the 8 long loops at the top of the hanger and tie a knot at the height you’d like it to hang and pull hard to tighten. I trimmed the ends past the knot to be even.
This crochet plant hanger will naturally ‘block’ itself with the weight of the pot and show off those beautiful stitches. When hanging, insert hook or nail securely below the knot.
Final Thoughts on Iris & Chains Crochet Plant Hanger
I hope you enjoyed this quick crochet project. Trendy crochet plant hangers are an excellent way to add a touch of boho decor to your home. If you make an Iris & Chains Crochet Plant Hanger, I would love for you to share it with me on social media!
Sharing is caring and a great way to support small businesses like mine at no additional cost! Bookmark this blog post or pin it to your favorite Pinterest board for later and to share with your friends.
Happy crocheting!


2 Comments
Cherrie
Love the look of the “chains”…this is a very pretty plant hanger, thank you for sharing
Chantal Campsey
Thank you so much, Cherrie!