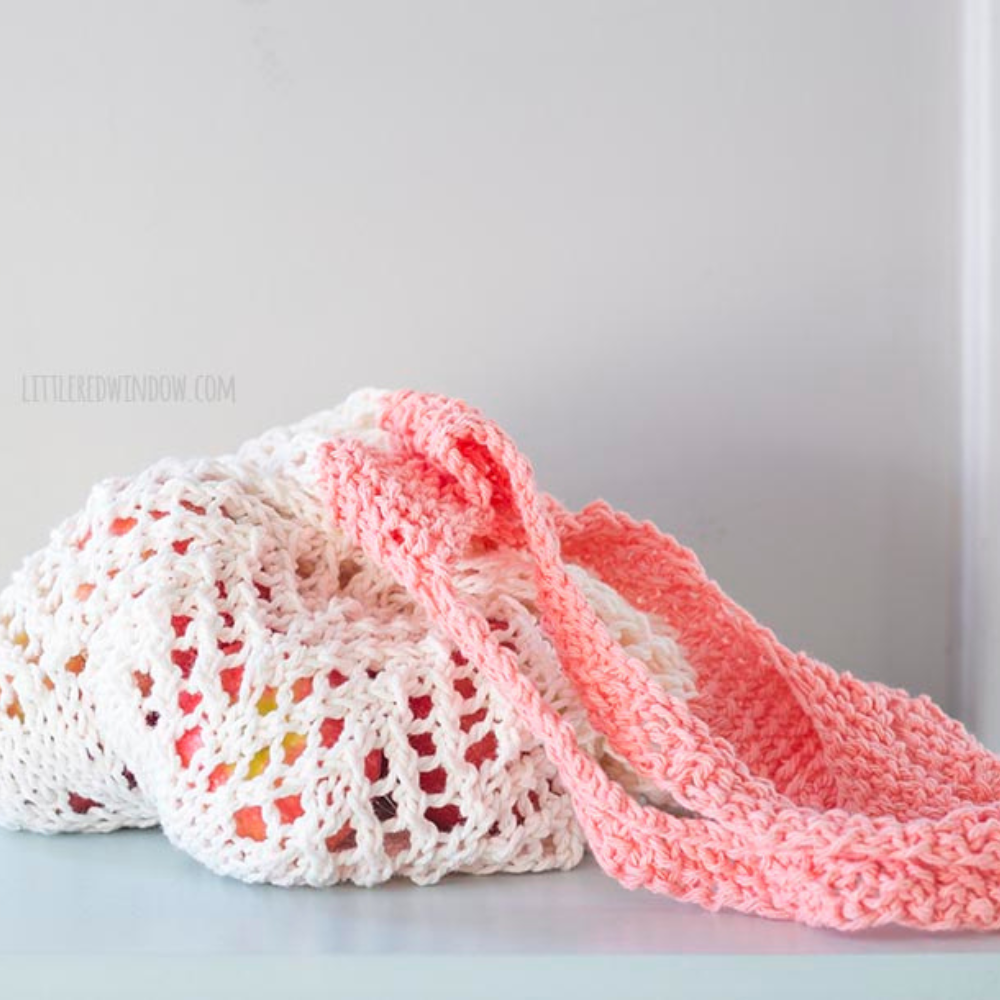
Blair Bag (Best Everyday Knitting Bag Pattern Free)
If you love knitting bags, you’ve come to the right place. Today I’ve got an awesome new knitting bag pattern free to share with you today!
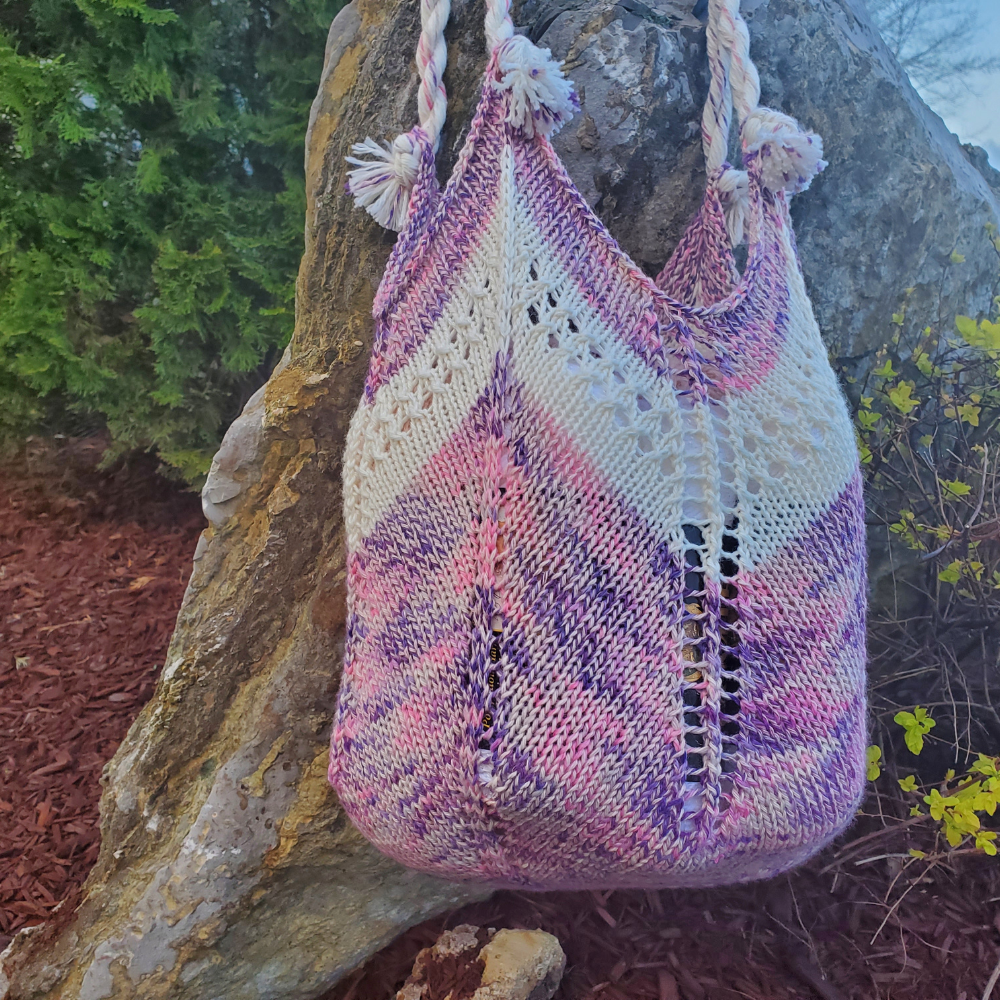
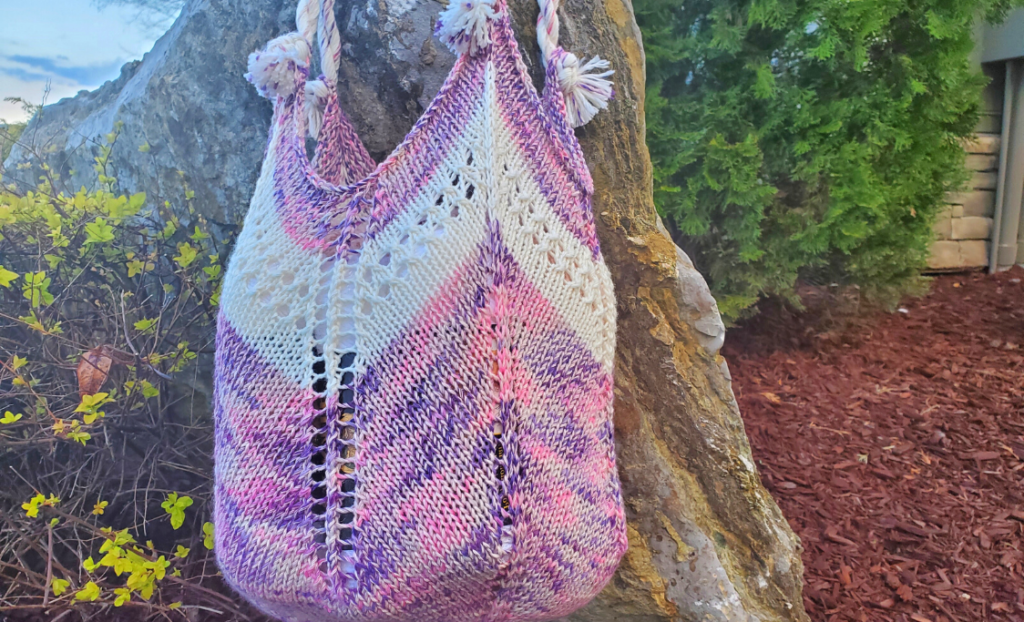
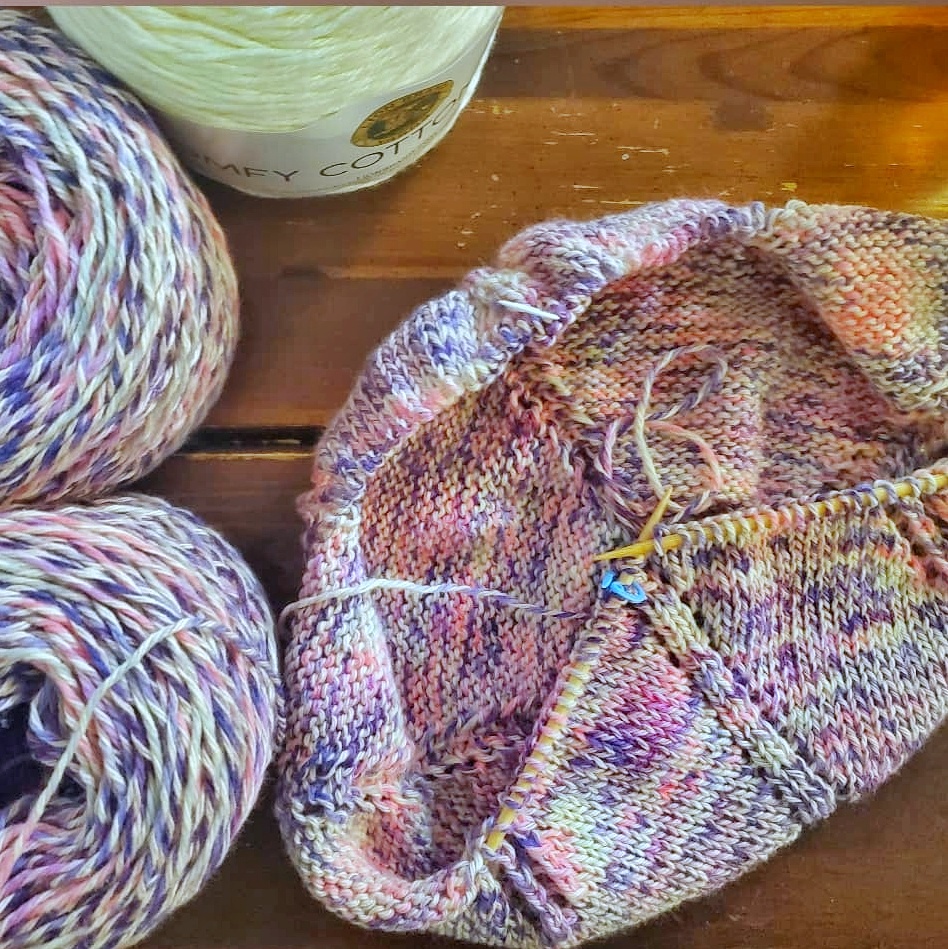
The Blair Bag is the bag of your dreams and will make a great addition to your collection of handmade bags.
Knitting (or crocheting) bags is a great and stylish alternative to using plastic grocery bags. I love taking this market tote bag to the grocery store or farmer’s market.
Looking for crochet bag patterns?
Check out Free Crochet Bag Pattern Roundup for free crochet bag patterns!
To download your FREE PDF click here.
Inspiration
The inspiration for the Blair Bag came from my Not Your Granny’s Beach Bag (crochet). It’s a simple design that starts with a square base for the bottom of the bag and then uses simple increases and decreases to create a chevron stitch pattern style bag. The lace details are made using simple yarn overs and give it a gorgeous chic look.
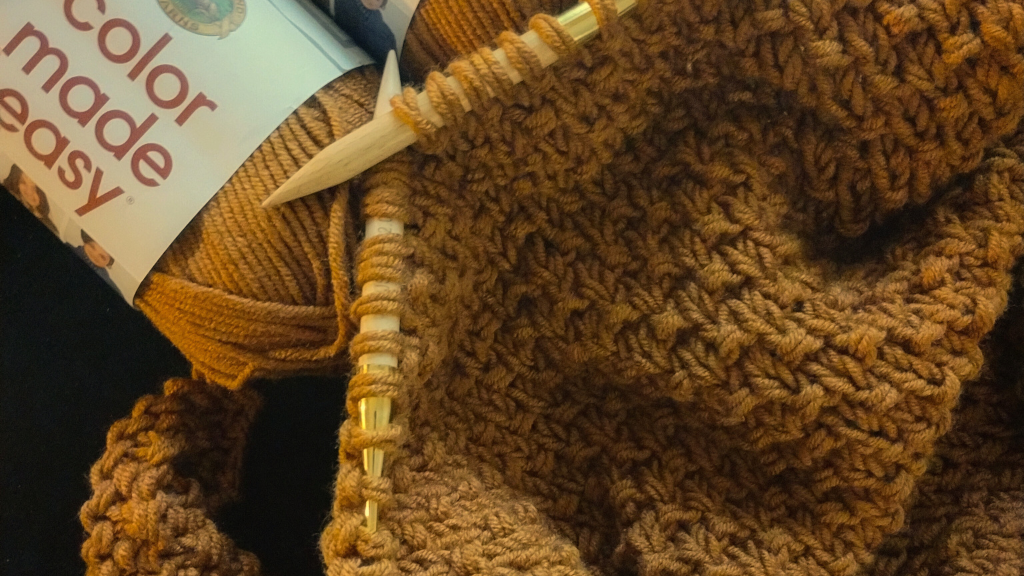
The name Blair for this style of bag came from Mr. Yarnique. When I started this bag I was using double pointed needles for the base and he commented that it looked like I was working on some sort of Blair Witch project with the needles flopping around everywhere. I thought it would be a cute name and here we are!
About The Yarn
I used Lion Brand Yarn Comfy Cotton Blend but you can use any dk/lightweight, worsted weight or even bulky weight yarn in cotton, linen, or any other similar fiber you’d like. Keep in mind your gauge will change with other weights of yarn, making a smaller or larger size of bag.
I recommend using yarn that is not very soft or stretchy. You want your finished bag to keep its integrity.
Some other types of worsted weight yarn I would recommend for this knitted bag are:
- Lion Brand Yarn 24/7 Cotton
- Big Twist Cotton Yarn
- Lily Sugar’n Cream
- Bernat Handicrafter Cotton
Techniques & Usage
I consider this one of those bag knitting patterns that’s intermediate skill level. Techniques used in this knitting bag pattern free include basic knitting skills such as knitting in the round, increasing and decreasing, and a unique cast on method called the pinhole cast on.
Click HERE for a video tutorial of this cast on method.
One of the things I love most about this bag is that the main body doesn’t have much shaping and it’s perfect for holding smaller items. There are no big holes throughout the bottom half of the bag so smaller produce and other items will stay secure as well.
The Blair Bag is a roomy bag perfect for everyday use whether you’re making it for a project bag, market bag, or otherwise.
Handle Technique
The handles are made using the same yarn as the bag, too. I absolutely love how they turned out.
I used multiple strands of each of the colors of yarn for the bag and twisted them together strategically to create a ‘rope’.
Scroll to the bottom of the page for a video tutorial including detailed instructions on how I made mine. You’re of course welcome to use any style of handle or any scrap yarn you like!
Skill Level
Intermediate
Gauge
16 sts and 24 rows of stockinette stitch in the round is 4″ x 4″ (10x10cm)
Finished Measurements
13” (33cm) wide and 13.5” (35cm) from base to tallest point (laid flat and before any blocking or stretching)
Materials
105g/ 206yd Lion Brand Comfy Cotton Blend in colorway Soothing Lavender (Color A)
25g/ 49yd Lion Brand Comfy Cotton Blend in colorway Whipped Cream (Color B)
Approximately 44g/ 96 yards extra for making handles
US Size 7/UK Size 7/4.5mm needles (DPNs and 24” circular needles)
4 Stitch Markers (1 different for BOR)
Tapestry needle for weaving ends
Measuring tape or gauge swatch measuring device
Notes
– * * indicates a repeat
– (xx) at the end of a row/round indicates how many total stitches for that row/round
Stitch Index
CO – cast on
R – row/round
BOR – beginning of row/round
PM – place marker
SM – slip marker
BO – bind off
YO – yarn over
K – knit
K1fb – knit 1 front and back (knit 1 through the front loop, do not remove stitch, knit 1 through the back loop [increase by 1 st])
K2tog – knit 2 stitches together
P – purl
CDD – center double decrease (slip 2 sts as one knitwise, k next st, pass both slipped sts as one over [decrease by 2 sts])
Pattern
Base
Foundation
With Color A and using the Pinhole method, CO 8 sts and divide them between your DPNs (I start this method with 3 needles [2, 2, and 4 sts] and add the 4th needle when I’ve completed a few rounds. Do what works best for you!
R1 k all sts (8)
R2 k1fb each st (16)
R3 k all sts (16)
Note: This is where I add my 4th needle, as I’m working R4 (splitting the sts on the needle with the most).
R4 *k1, yo, k2, yo, k1* repeat from * to * 3x (24)
R5 k all sts (24)
R6 *k1, yo, k until 1 st left on needle, yo, k1* repeat from * to * 3x (32)
R7 k all sts (32)
Repeat R6-7 until you have 40 sts on each side (160 sts total)
Note: Switch to circulars once you have enough sts or when your DPNs start getting crowded. PM in each corner (in between each DPN) with different colored marker at BOR.
Rounds will start back at 1 for the body of your bag.
Body
R1 *k19, k2tog, k19* repeat from * to * 3x, SM as you go (156)
R2 *k1, yo, k15, ssk, yo, CDD, yo, k2tog, k15, yo, k1* repeat from * to * 3x, SM as you go (156)
R3 k all sts, SM as you go (156)
R4-24 Repeat R2-3 ending on an increase/decrease round
Attach a new strand of Color B
R25-31 Repeat R2-3 beginning with a knit row and ending on an increase/decrease row
R32 *k1, yo, k1, **yo, ssk** repeat from ** to ** 8x, yo, CDD, yo, k2tog, **yo, k2tog** repeat from ** to ** 7x, yo, k1, yo, k1* repeat from * to * 3x (164)
Note: In order to get the lace to work with the pattern you will increase 2 sts on each side. Decreases on the next round will even the stitch count back out again.
R33 *k3, ssk, k to 5 sts before marker, k2tog, k3* repeat from * to * 3x (156)
R34-35 Repeat R2-3
R36-37 repeat R32-33
R38-41 Repeat R2-3 beginning with a knit row and ending on an increase/decrease row
Attach a new strand of Color A
R42-47 Repeat R2-3 beginning with a knit row and ending on an increase/decrease row
R48 *SM, YO 3x, k to next marker* repeat from * to * 3x (164)
R49 *[k1, p1, k1] in YO, k to next marker* repeat from * to * 3x, remove markers as you go (164)
R50 k all sts (164)
BO all sts using your preferred method. Weave in your ends.
Follow the video tutorial below for making your handles.
To download your FREE PDF click here.
If you love this free knitting pattern, check out my Free Knit Bag Pattern Roundup for more free knit bag patterns!
Final Thoughts on the Blair Bag
I hope you loved this easy knitting bag pattern free. It’s great for making knit tote bags or a market bag. Mine wasn’t the most sturdy bag with the softer cotton yarn, but it’s a super functional bag nonetheless. The square bottom provides a solid foundation and the lace pattern within the body of the chevron pattern gives it that perfectly feminine touch that can be hard to find.
The Blair Bag is a great alternative to your standard reusable grocery bag. What type of yarn will you make yours in? Let me know in the comments below!
Sharing is caring and a great way to support small businesses like mine at no additional cost! Bookmark this blog post or pin it to your favorite Pinterest board for later and to share with your friends.
Happy knitting!
Bloggers: I would love for you to feature my work in a roundup! You may use one photo and link directly to my blog for the free pattern. Send me an email at yarniqueblog@gmail.com with a link to your post so I can share it with my followers.
PLEASE READ: THIS PATTERN AND ITS CONTENTS ARE THE SOLE PROPERTY OF YARNIQUE (CHANTAL CAMPSEY) AND MAY NOT BE ALTERED, SOLD, OR REDISTRIBUTED IN ANY WAY WITHOUT PERMISSION FROM ITS AUTHOR. YOU MAY, HOWEVER, SELL AS MANY FINISHED PROJECTS AS YOU DESIRE, I JUST ASK THAT YOU REFERENCE MY BLOG AND/OR SHOPS FOR CREDIT FOR THE PATTERN.