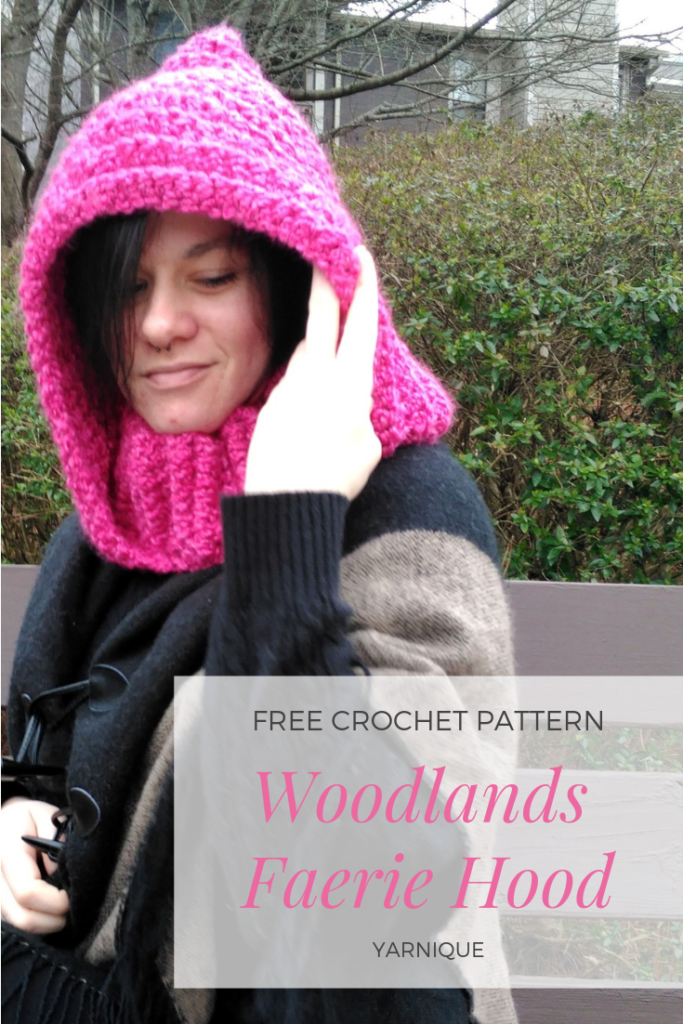
Woodlands Faerie Hood (Free Crochet Hooded Cowl Pattern)
If you’re looking for a thick and cozy crochet hooded cowl pattern, you’ve come to the right place! Whether it’s the winter season yet or not, any time of the year is perfect for stitching an oversized hooded cowl pattern (in my humble opinion!)
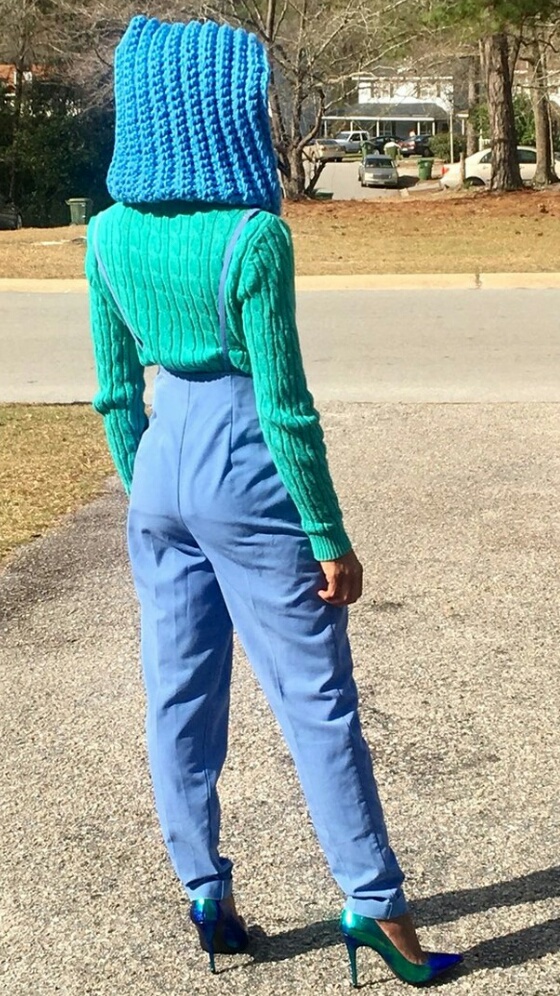
The Woodlands Faerie Hood is the crochet version of my Snuggly Love Bubble shown below that I recently designed for Darn Good Yarn. I loved the bright colors and beautiful texture of this design so much that I wanted to create a crochet version so everyone can make one!
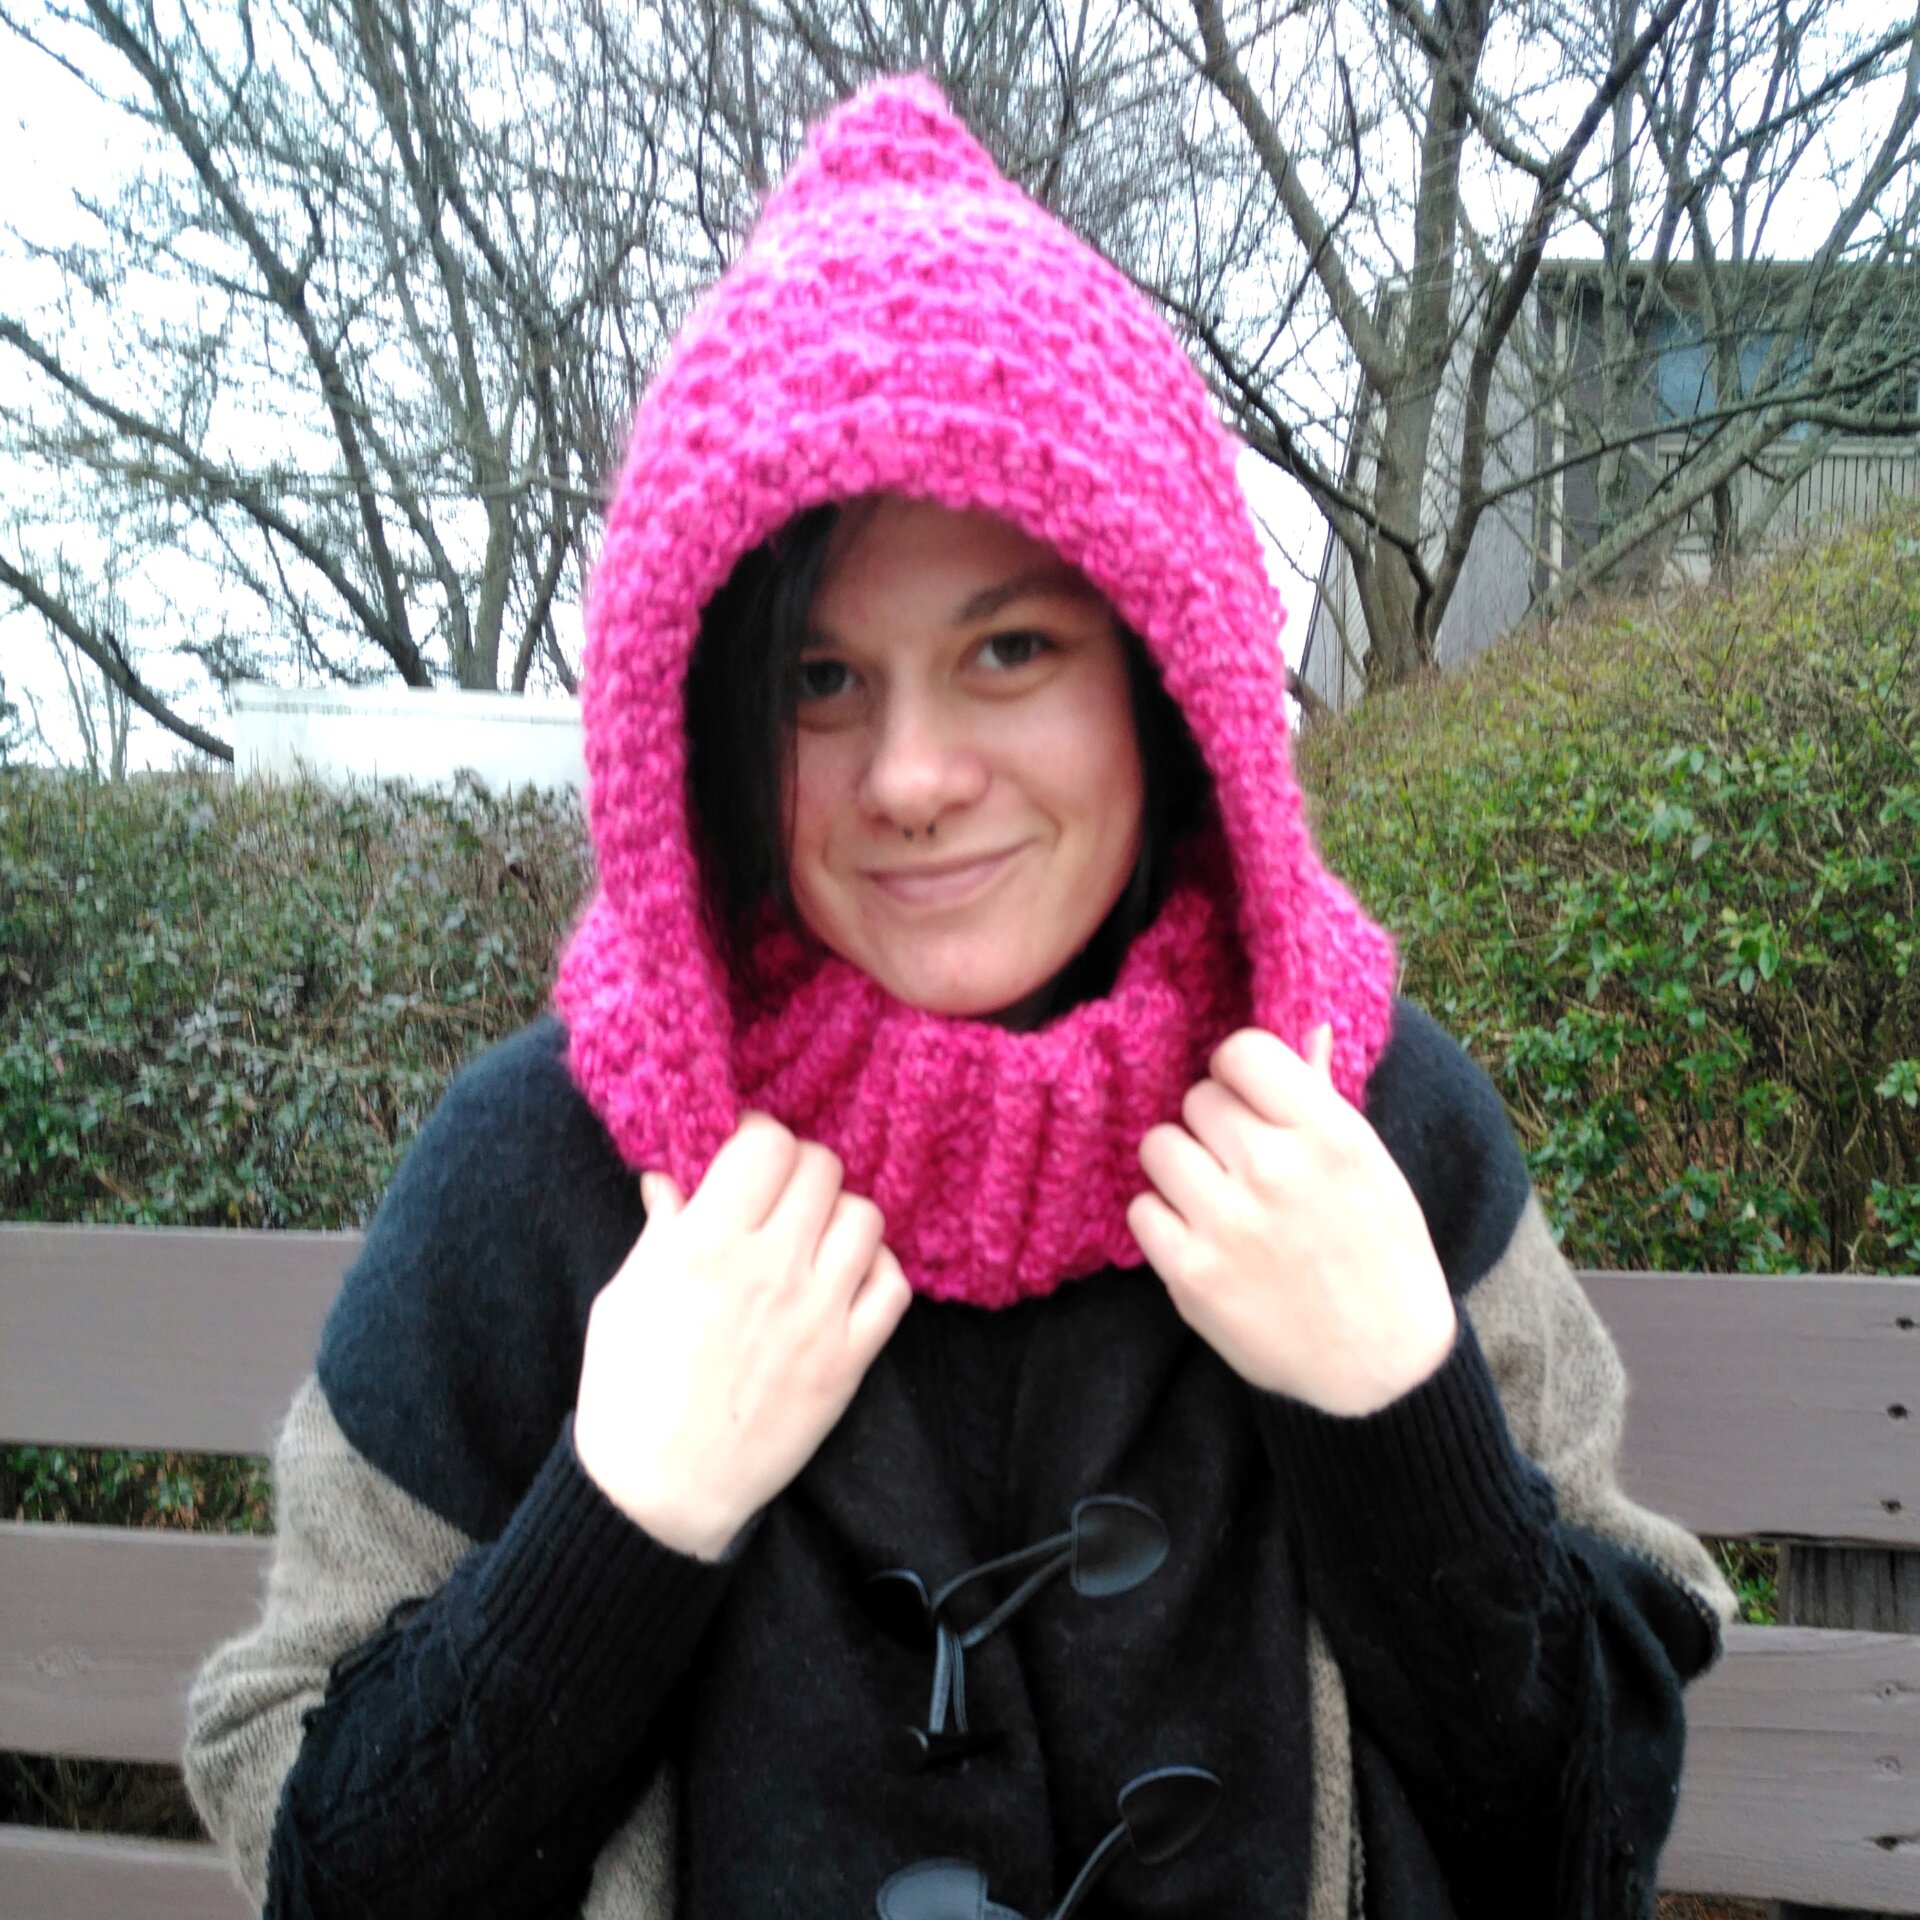
This hooded cowl crochet pattern features an oversized hood and a thick and cozy ribbed cowl that’s crocheted right onto the hood, making it a perfect cold weather accessory ready to protect you against the cold wind.
Scroll to see the crochet hooded cowl pattern completely free (with ads, of course) or get an affordable, easy to read PDF on Ravelry, Etsy, or LoveCrafts.
About The Yarn
This easy crochet cowl with a hood is written to be made with super bulky weight yarn or any combination of yarn weight that you can meet gauge with.
I made mine using double strands of Lion Brand Yarn Homespun in the yarn color Peony which is a bulky weight yarn. Using a heavier yarn provides extra warmth which is mostly what I was going for with this design.
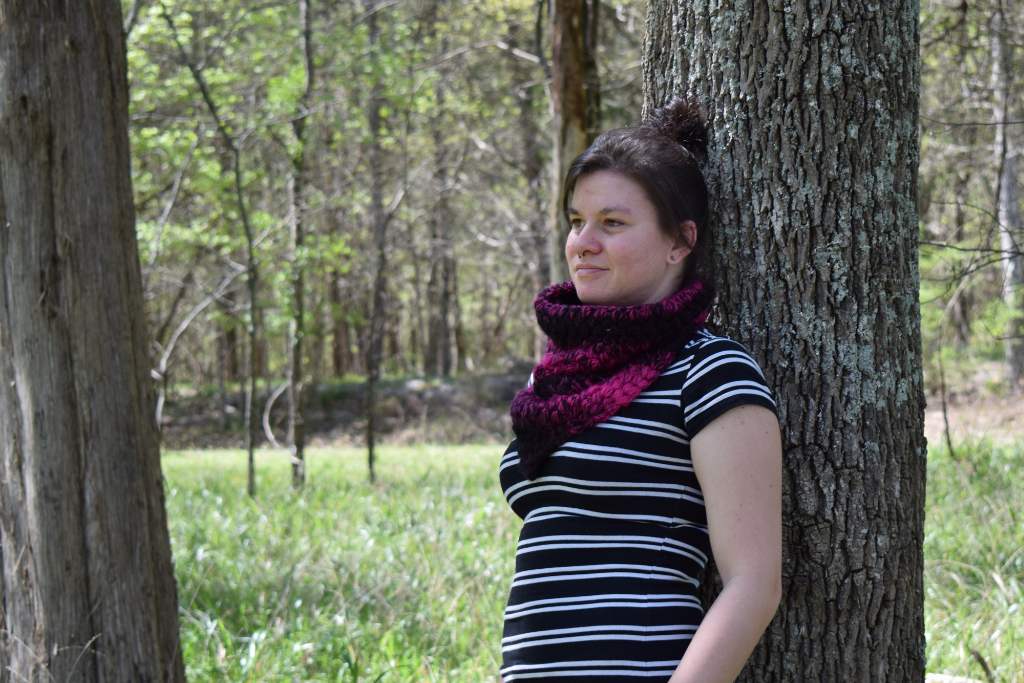
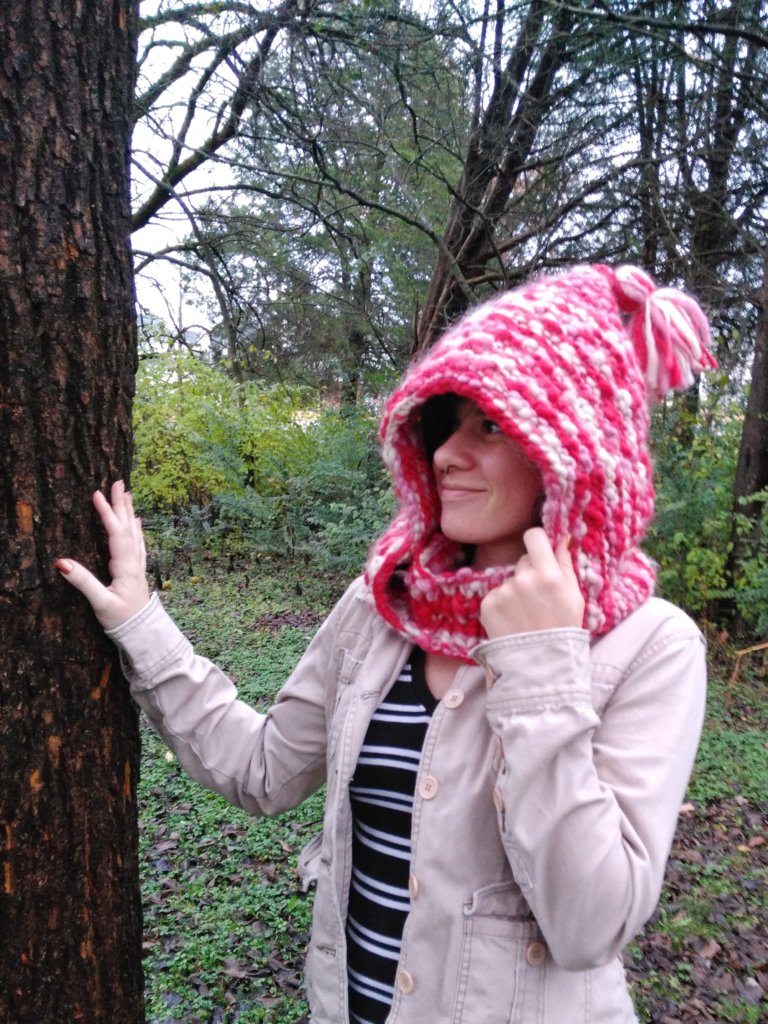
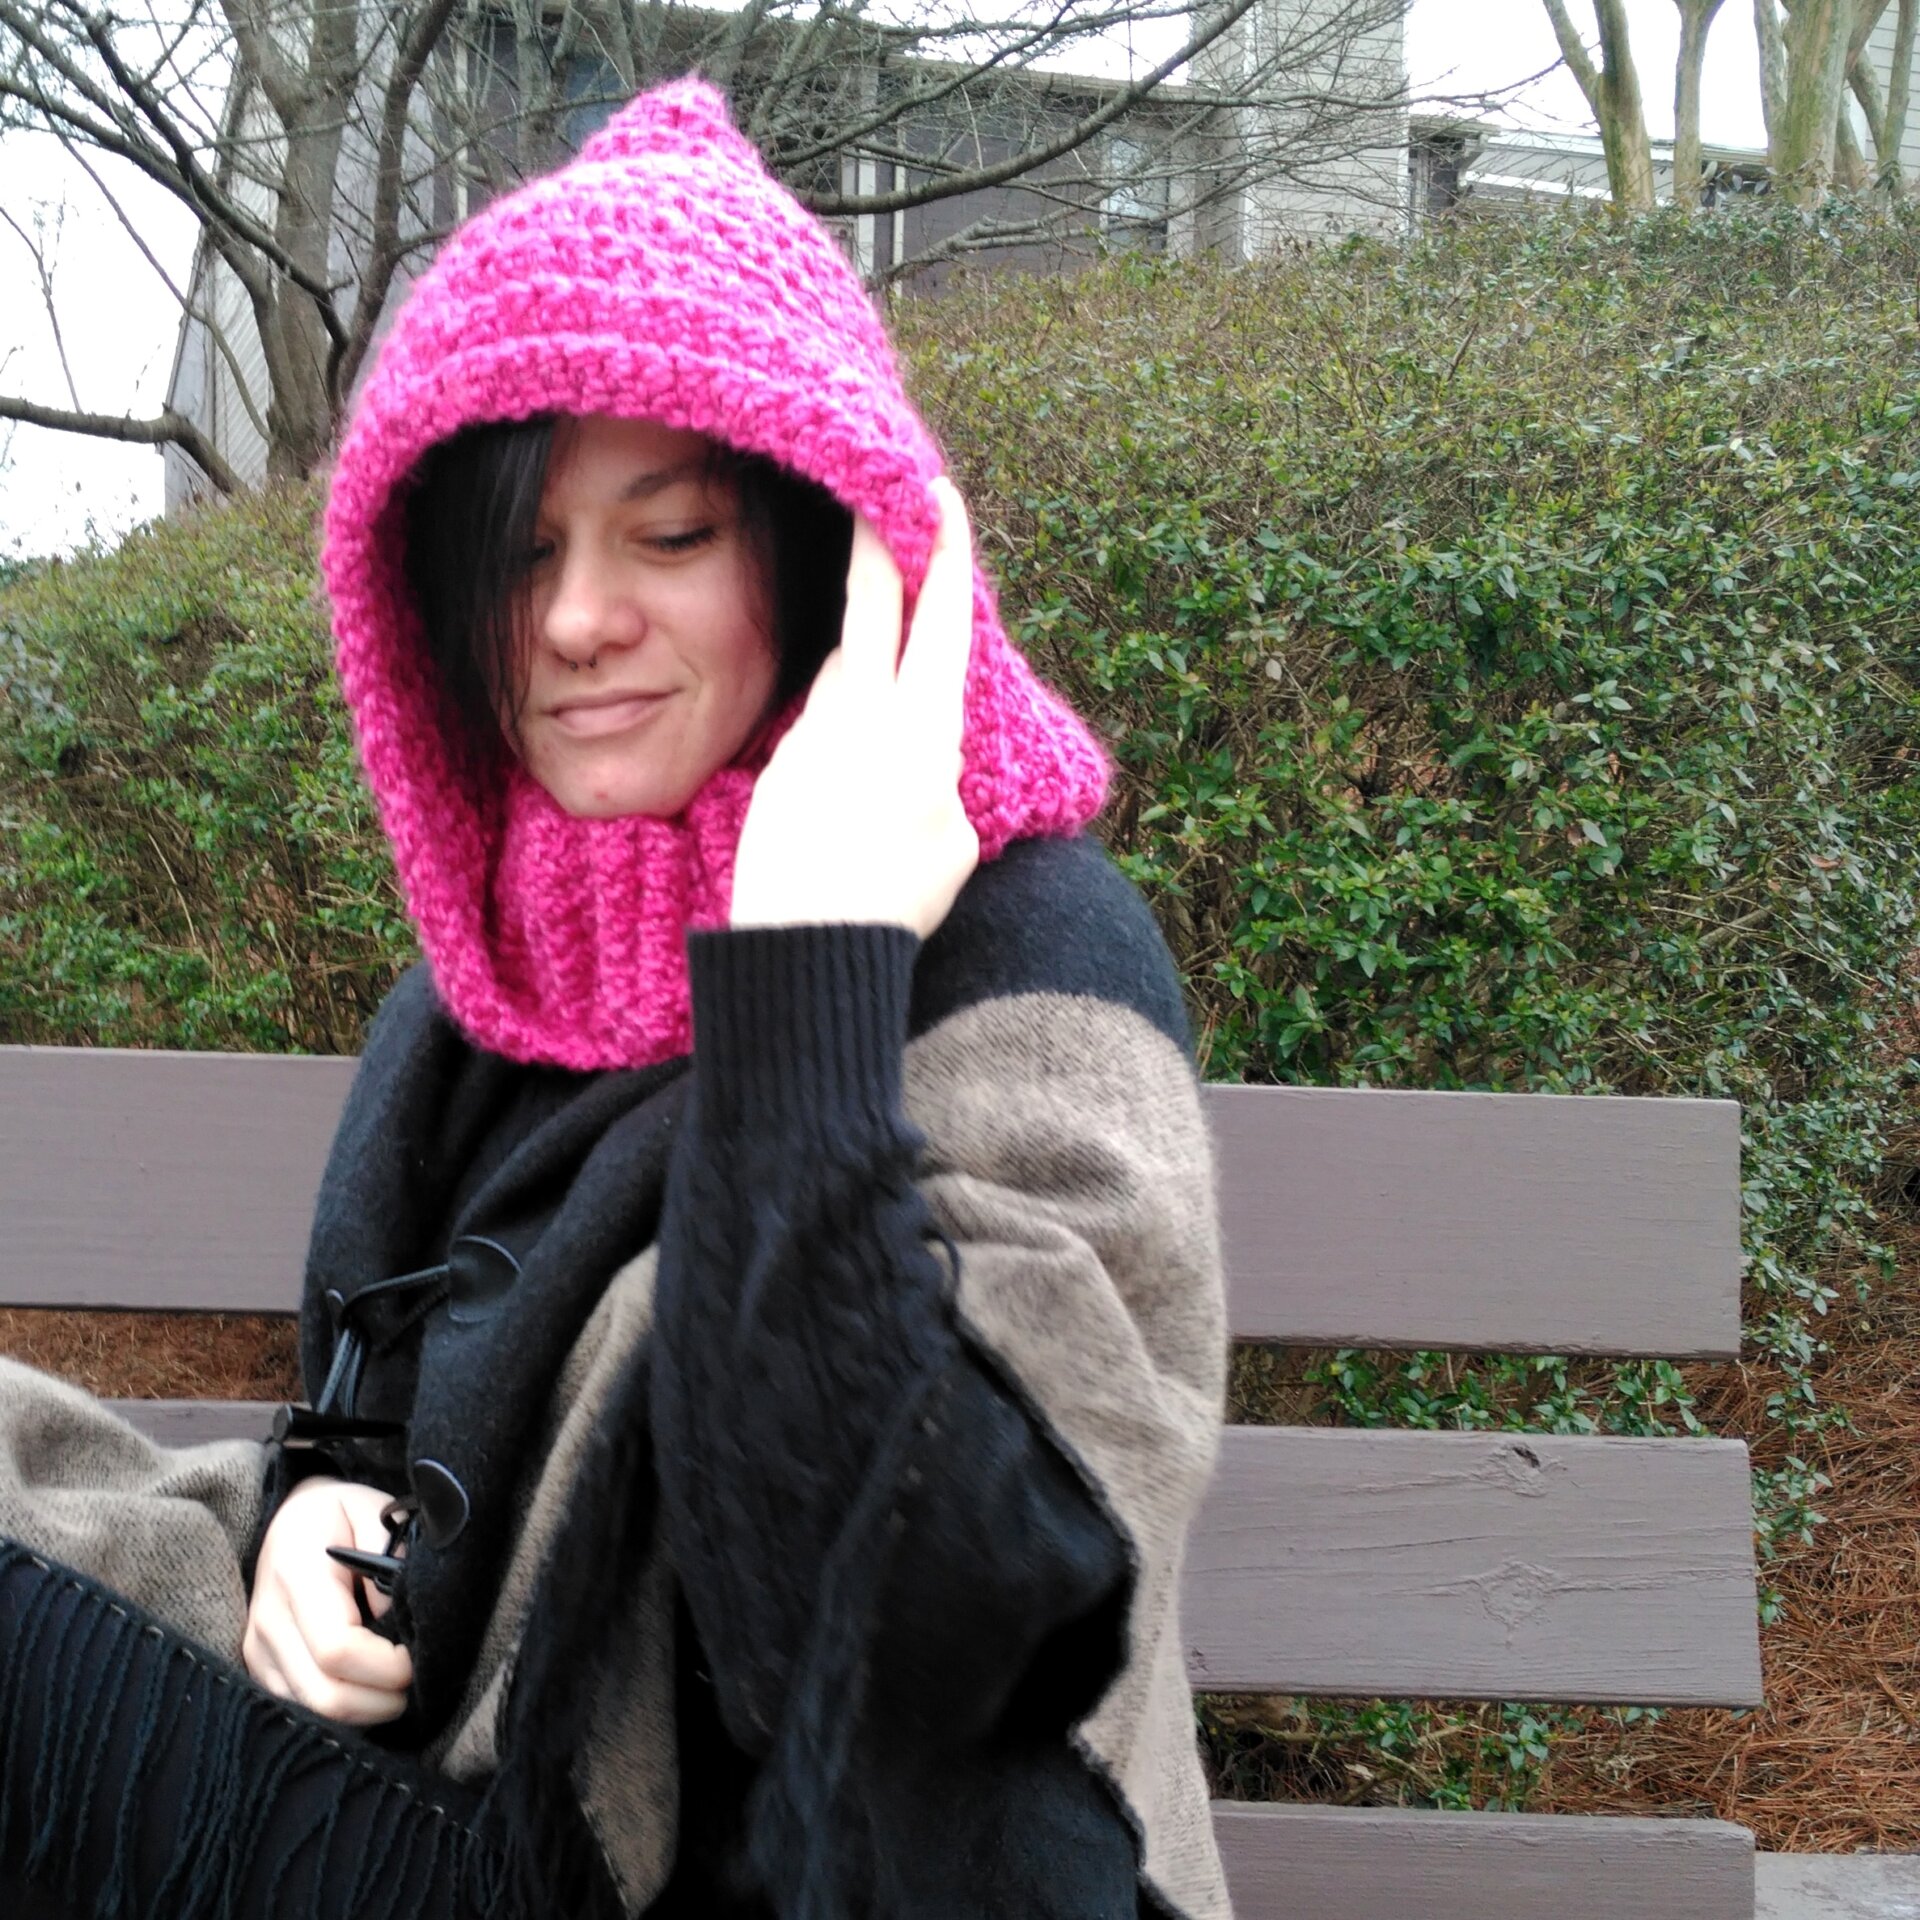
I love how Leah @the.craftyyogi styled hers! She tested this pattern for me and did not disappoint with the finished photos (see below)!
Leah made her hood with triple strands of worsted weight acrylic yarn which is typically equivalent to one strand of super bulky weight yarn.
Techniques Used
The simple stitch pattern uses only basic stitches to create a fun and functional ribbed texture throughout making this a great pattern for everyone, even if you’re a beginner crocheter.
The hood pattern is worked flat in one large piece in single crochet stitches in the back loop only, then seamed to create the back of the hood (you could also crochet the edges together instead of seaming). The cowl is then crocheted right onto the hood using front post and back post half double crochet stitches, so if you dislike seaming like I do, you’ll appreciate that aspect!
Because the warm crochet cowl is crocheted right onto the hood, the cowl height is completely customizable. Once you create the foundation, you’ll simply crochet as many post stitch rows as you’d like until you get your desired length.
This lovely hooded cowl pattern is written in average women’s size (see finished measurements below). It would be very easy to resize the finished product by using a heavier or lighter yarn and appropriately sized mm hook.
A smaller version for little girls (or boys!) would be absolutely adorable. And as an added bonus, I think this would be more likely to stay on smaller children versus slouching and falling off.
Skill Level
Easy
Gauge
7 stitches of single crochet and 7 rows of single crochet is 4″ x 4″ (10x10cm)
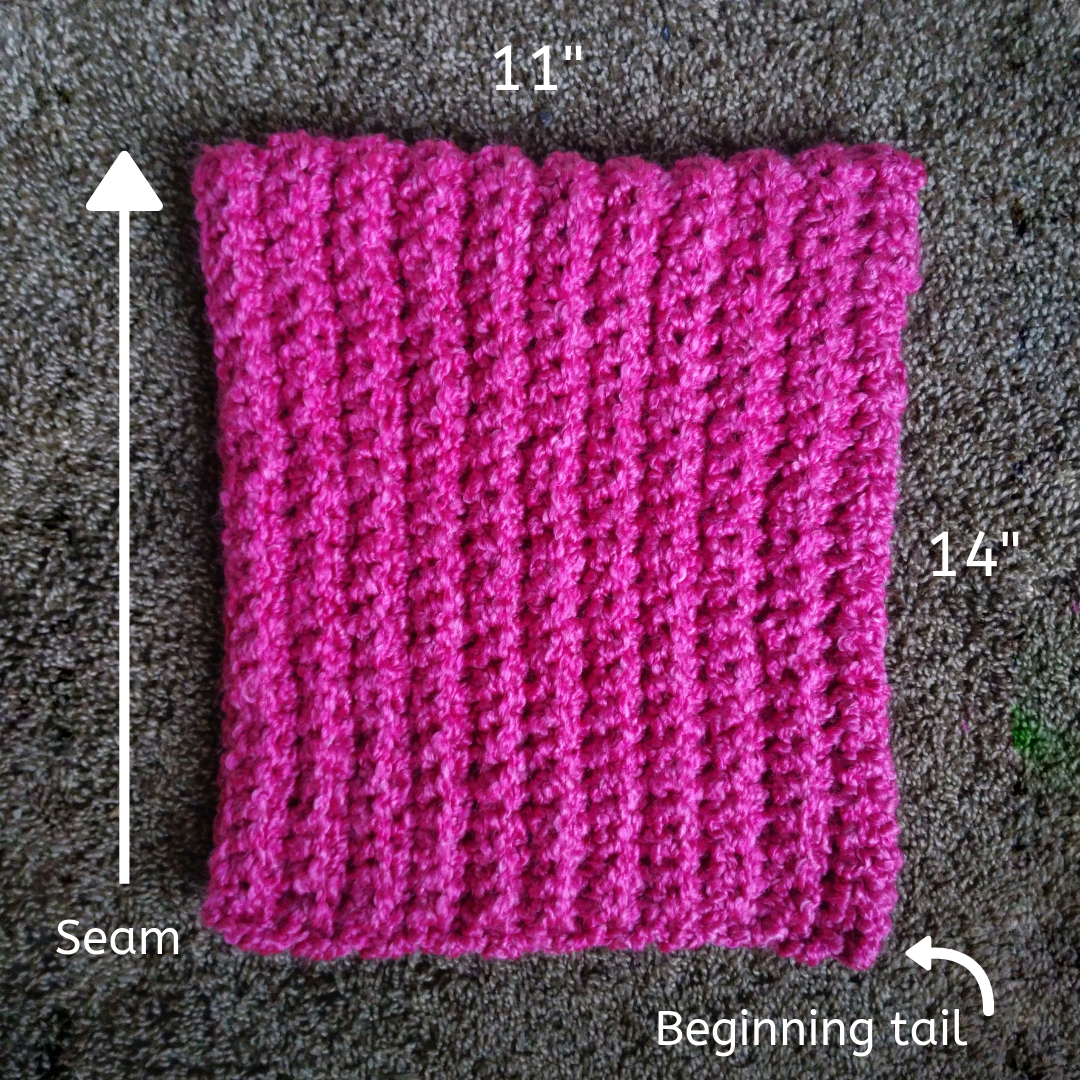
Finished Measurements
Laid Flat:
Hood: 11″ x 14″
Cowl: 4″ x 11″
Materials
400 yards total Lion Brand Yarn Homespun, doubled (read more about yarn substitutions above)
US Size N/15/10 mm crochet hook or size needed to obtain gauge
Yarn needle for weaving ends
Scissors
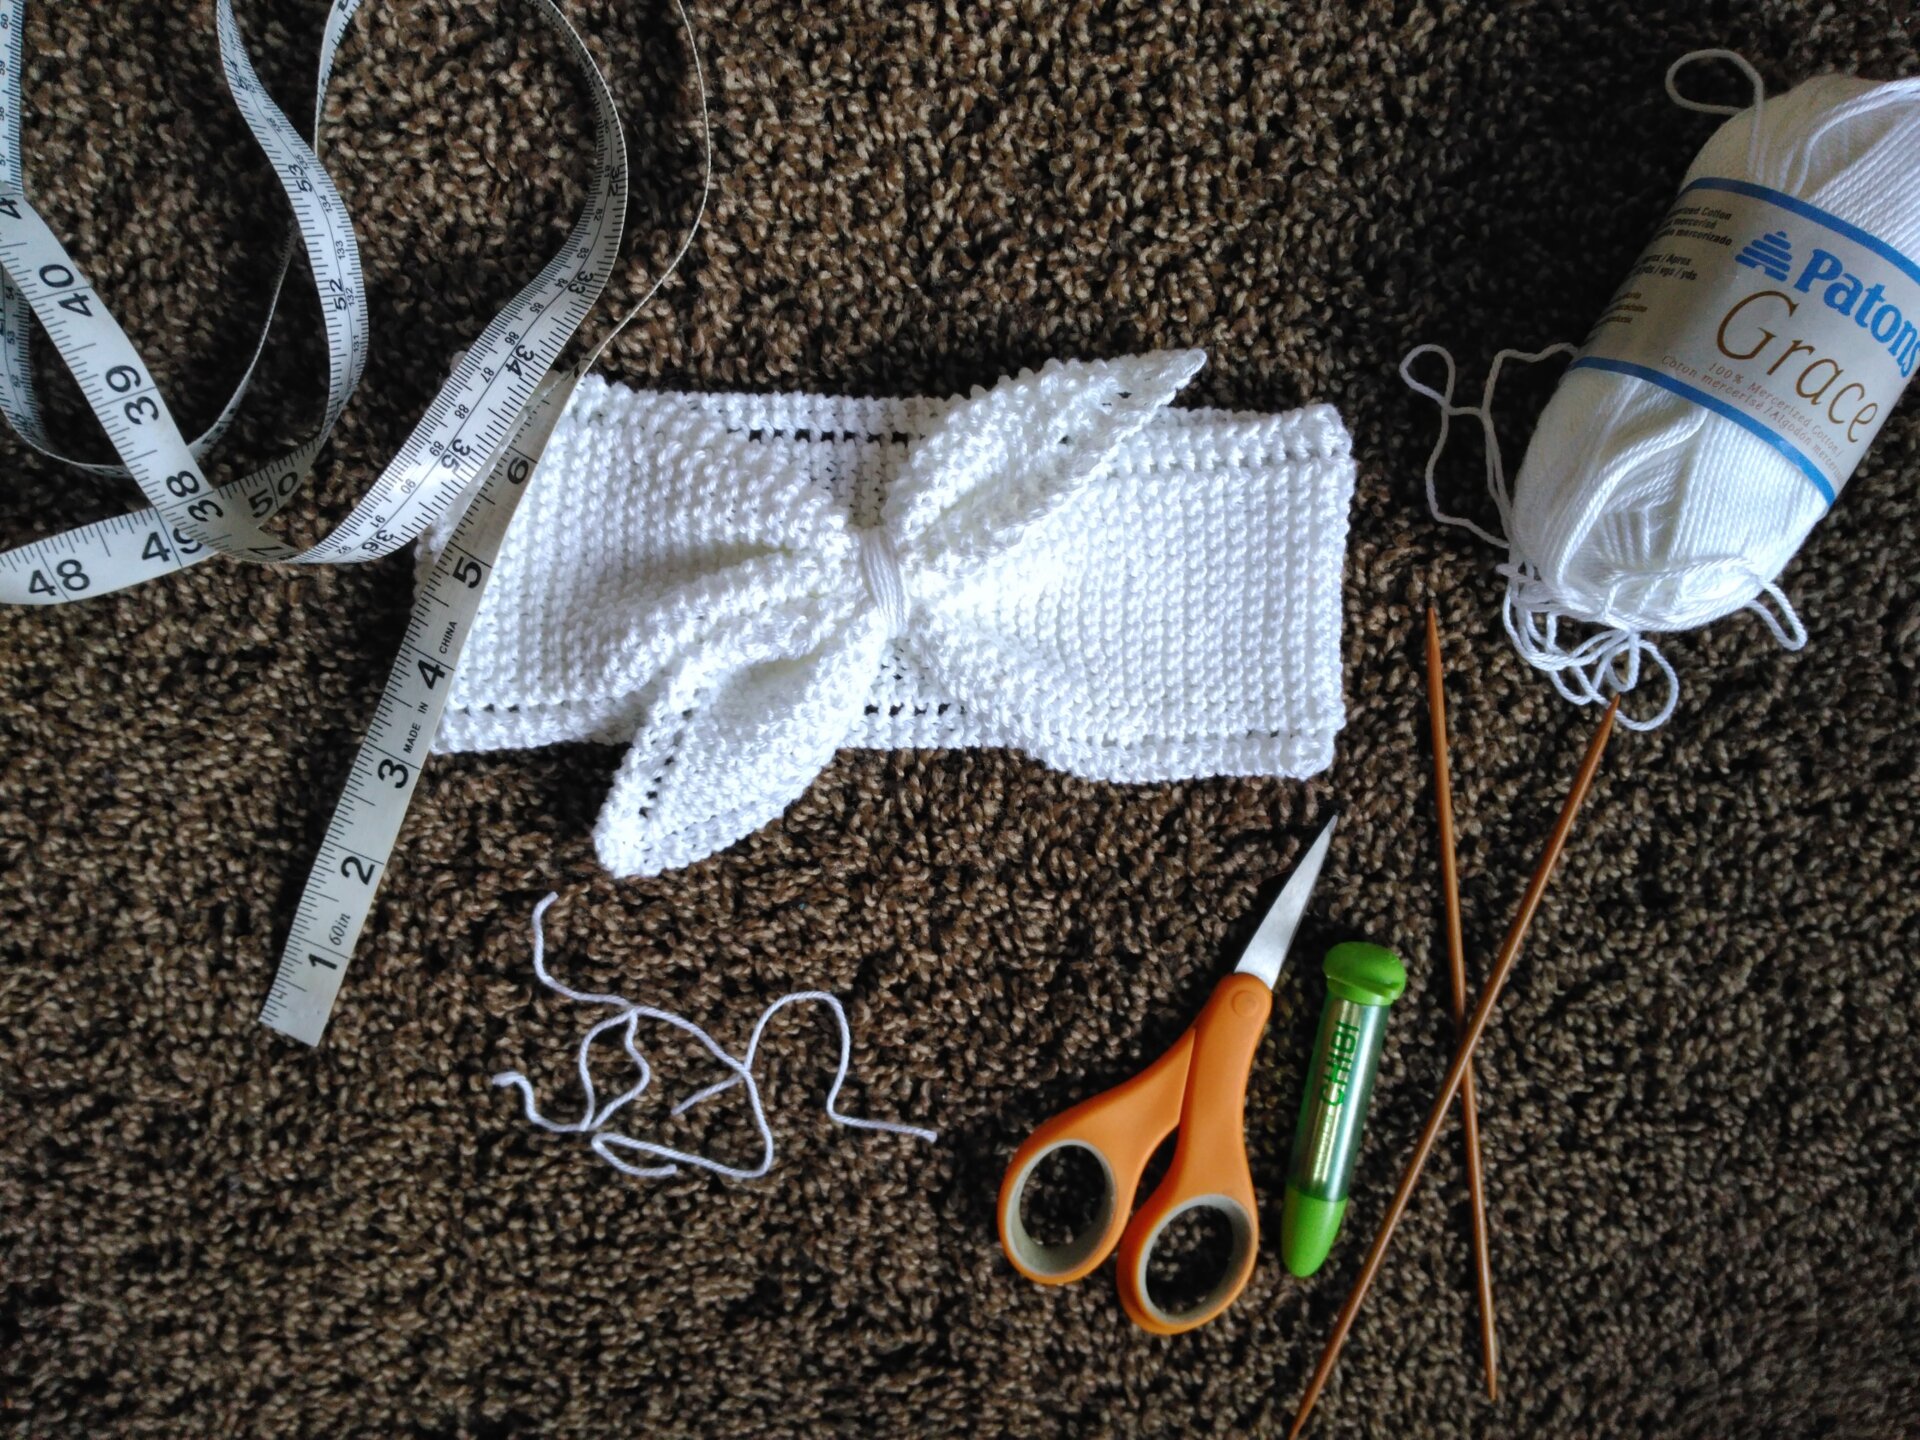
Measuring device for gauge
Notes
-* * indicates a repeat
-(xx) at the end of a row/round indicates how many total stitches for that row/round
Stitch Index
R – row/round
ch – chain
st(s) – stitch(es)
fhdc – foundation half double crochet
sl st – slip stitch
sc – single crochet
scBLO – single crochet in the back loop only
hdc – half double crochet
fphdc – front post half double crochet
bphdc – back post half double crochet
Crochet Hooded Cowl Pattern
**Start with a 6″ tail and do not weave until the end.
Foundation ch 52
R1 sc in 2nd ch from hook and each ch across, ch 1, turn (51)
R2-20 sc in 1st st, scBLO until one st remains, sc in last st, ch 1, turn (51)
R21 Repeat R2 once more, break yarn leaving a tail about 20″ for sewing
Seaming the hood
Fold the fabric in half to make a 14″ x 11″ rectangle. Using the long tail, whip stitch the folded edge of R21 together, starting at the bottom corners and ending at the fold of the fabric.
Creating the cowl
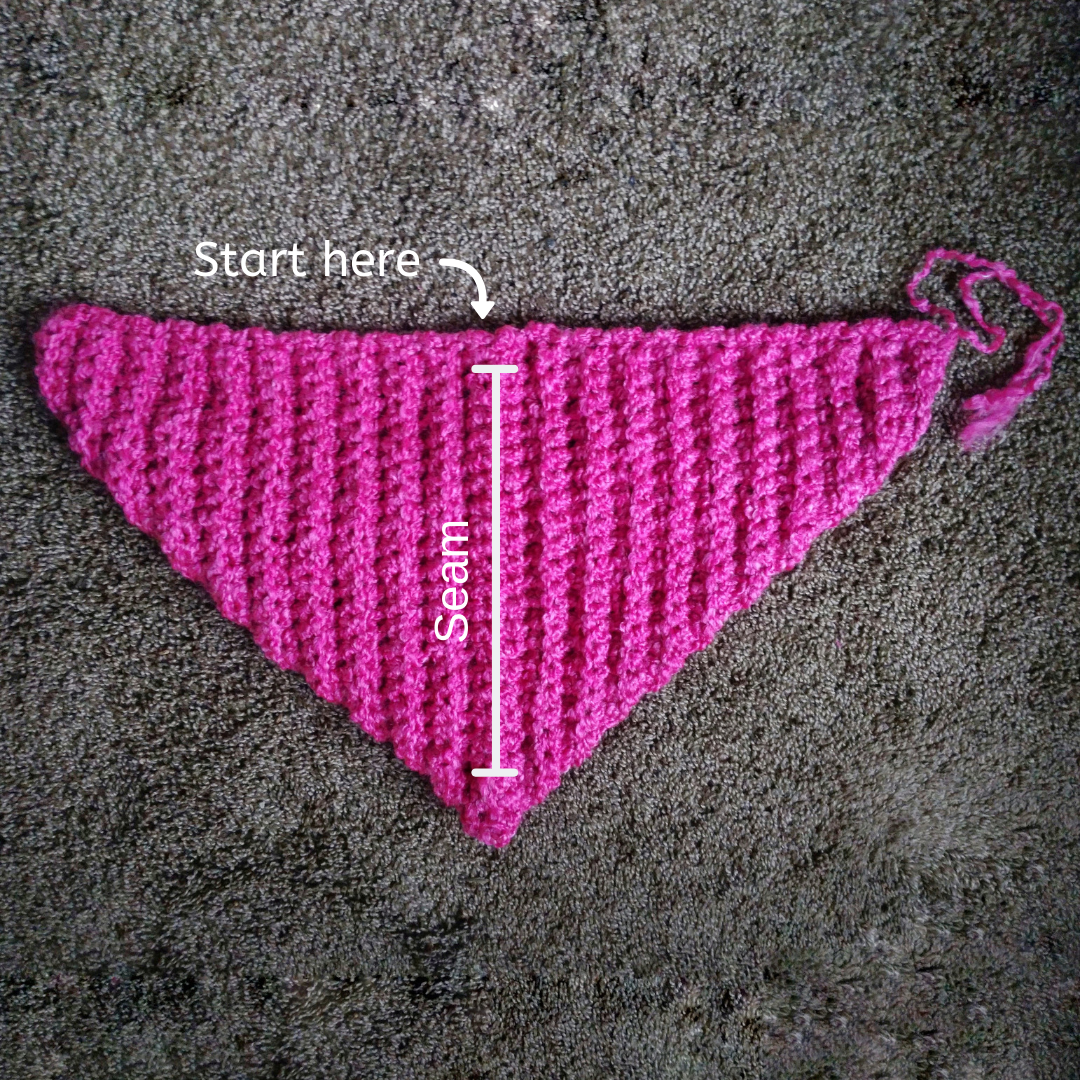
R1 Starting to the left of the seam (see photo below), hdc 21 evenly to edge, fhdc 6, hdc 21 across the other half of raw edge to the seam, sl st to 1st hdc (cowl established)
R2-12 ch 2 (counts as a st) *2 fphdc, 2 bphdc* until 1 st remains, bphdc, join with a sl st to top of ch 2 (48)
Use the beginning tail to close the gap that has formed between the hood and cowl from the fhdc.
Weave in ends and you’re done!

Looking for more free crochet patterns?
Click HERE to see all of my free crochet patterns by type of project or HERE to see all of my crochet pattern round-ups!
Final Thoughts on the Woodlands Faerie Hood
I hope you enjoy making this crochet hooded cowl pattern. This is a fun project that you can whip up in an evening or two and would make great gifts for family members and others as well.
What yarn will you use to make yours? Let me know in the comments below!
Sharing is caring and a great way to support small businesses like mine at no additional cost! Bookmark this blog post or pin it to your favorite Pinterest board for later and to share with your friends.
Happy crocheting!
Bloggers: I would love for you to feature my work in a roundup! You may use one photo and link directly to my blog for the free pattern. Send me an email at yarniqueblog@gmail.com with a link to your post so I can share it with my followers.
PLEASE READ: THIS PATTERN AND ITS CONTENTS ARE THE SOLE PROPERTY OF YARNIQUE (CHANTAL CAMPSEY) AND MAY NOT BE ALTERED, SOLD, OR REDISTRIBUTED IN ANY WAY WITHOUT PERMISSION FROM ITS AUTHOR. YOU MAY, HOWEVER, SELL AS MANY FINISHED PROJECTS AS YOU DESIRE, I JUST ASK THAT YOU REFERENCE MY BLOG AND/OR SHOPS FOR CREDIT FOR THE PATTERN.